In my previous post I talked about 24v presence sensors for Loxone home automation:
Shout out to Malc Crook (https://hackaday.io/mal8837) and Adam (https://hackaday.io/Bobbsta10) who both contacted me to say that the PIR linked to in the original post is no longer the one you get when you order the same item from the same seller 🙁
Fear not, for I have hacked the new one this evening and it’s pretty straight forward 🙂

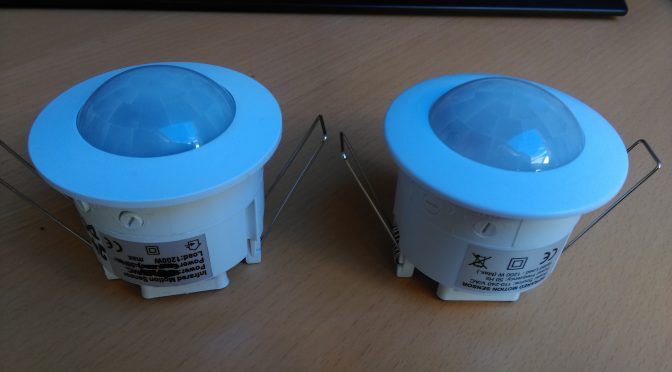
Well that mostly looks similar…
Still looks similar…
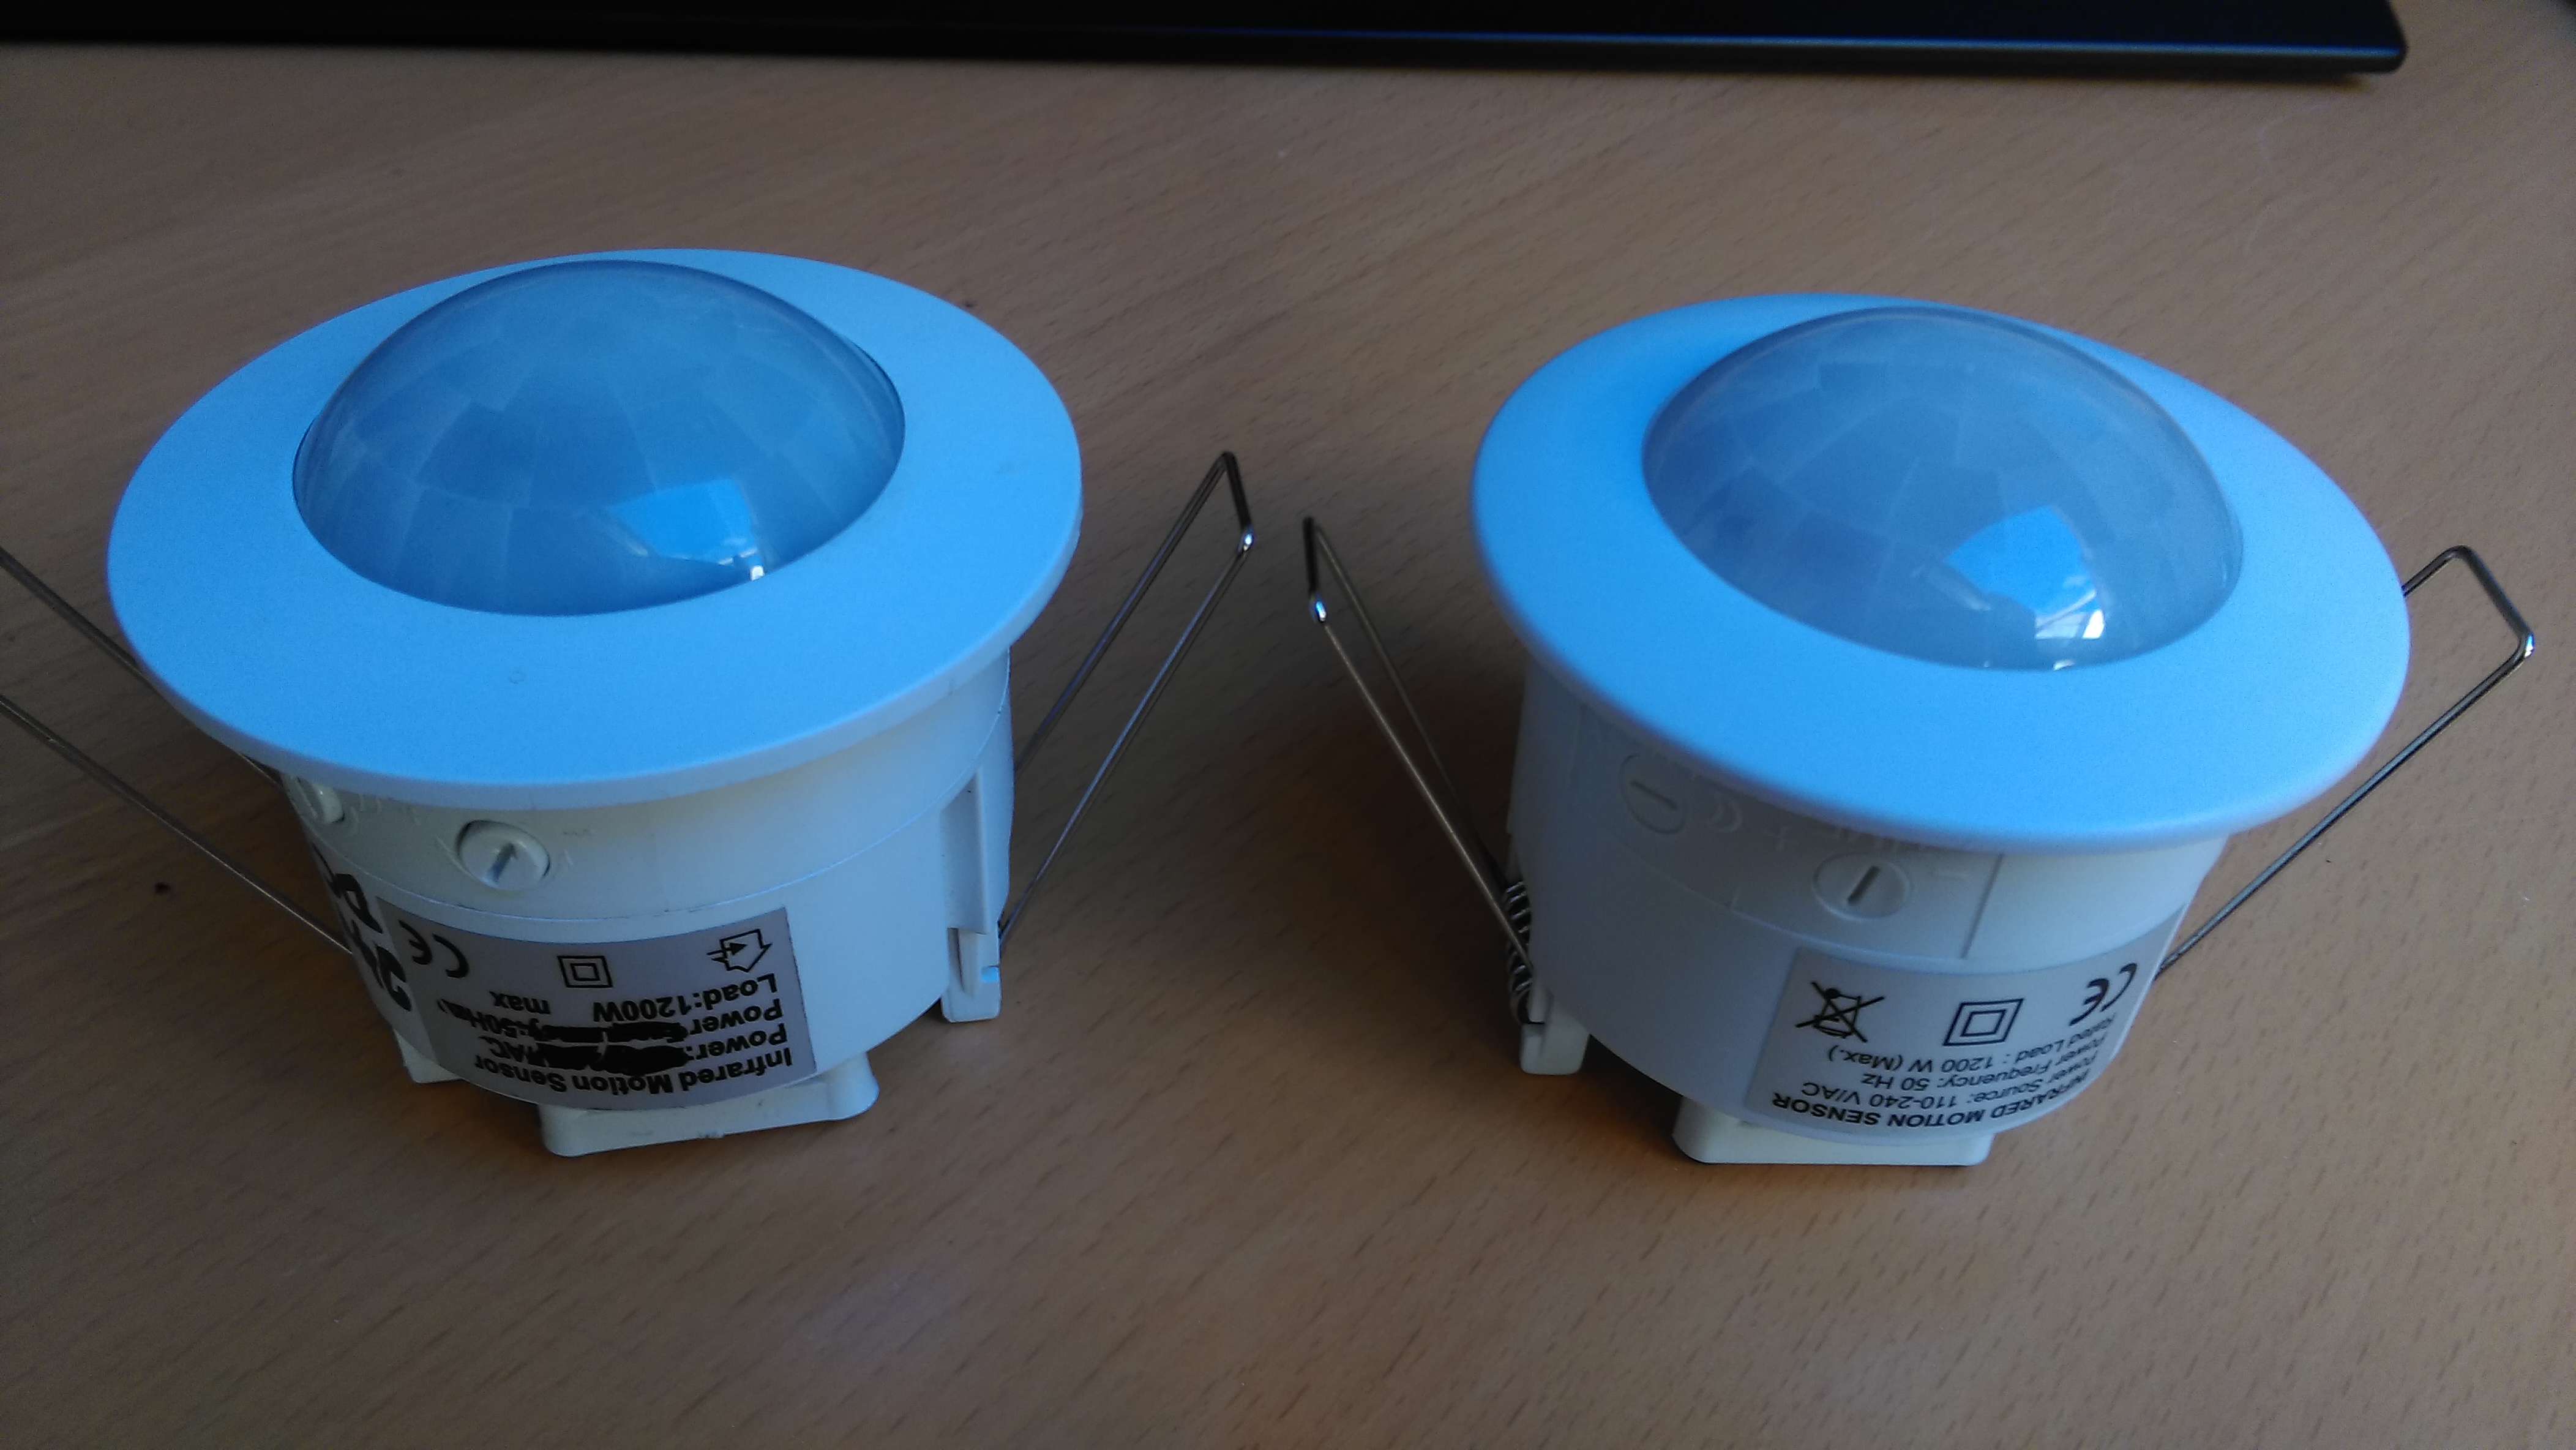
Well that’s different. The two boards are fixed together and the front board has to come away from the plastic shafts for altering the time and lux level
Those are really annoying to get back in but I’ll come back to that.
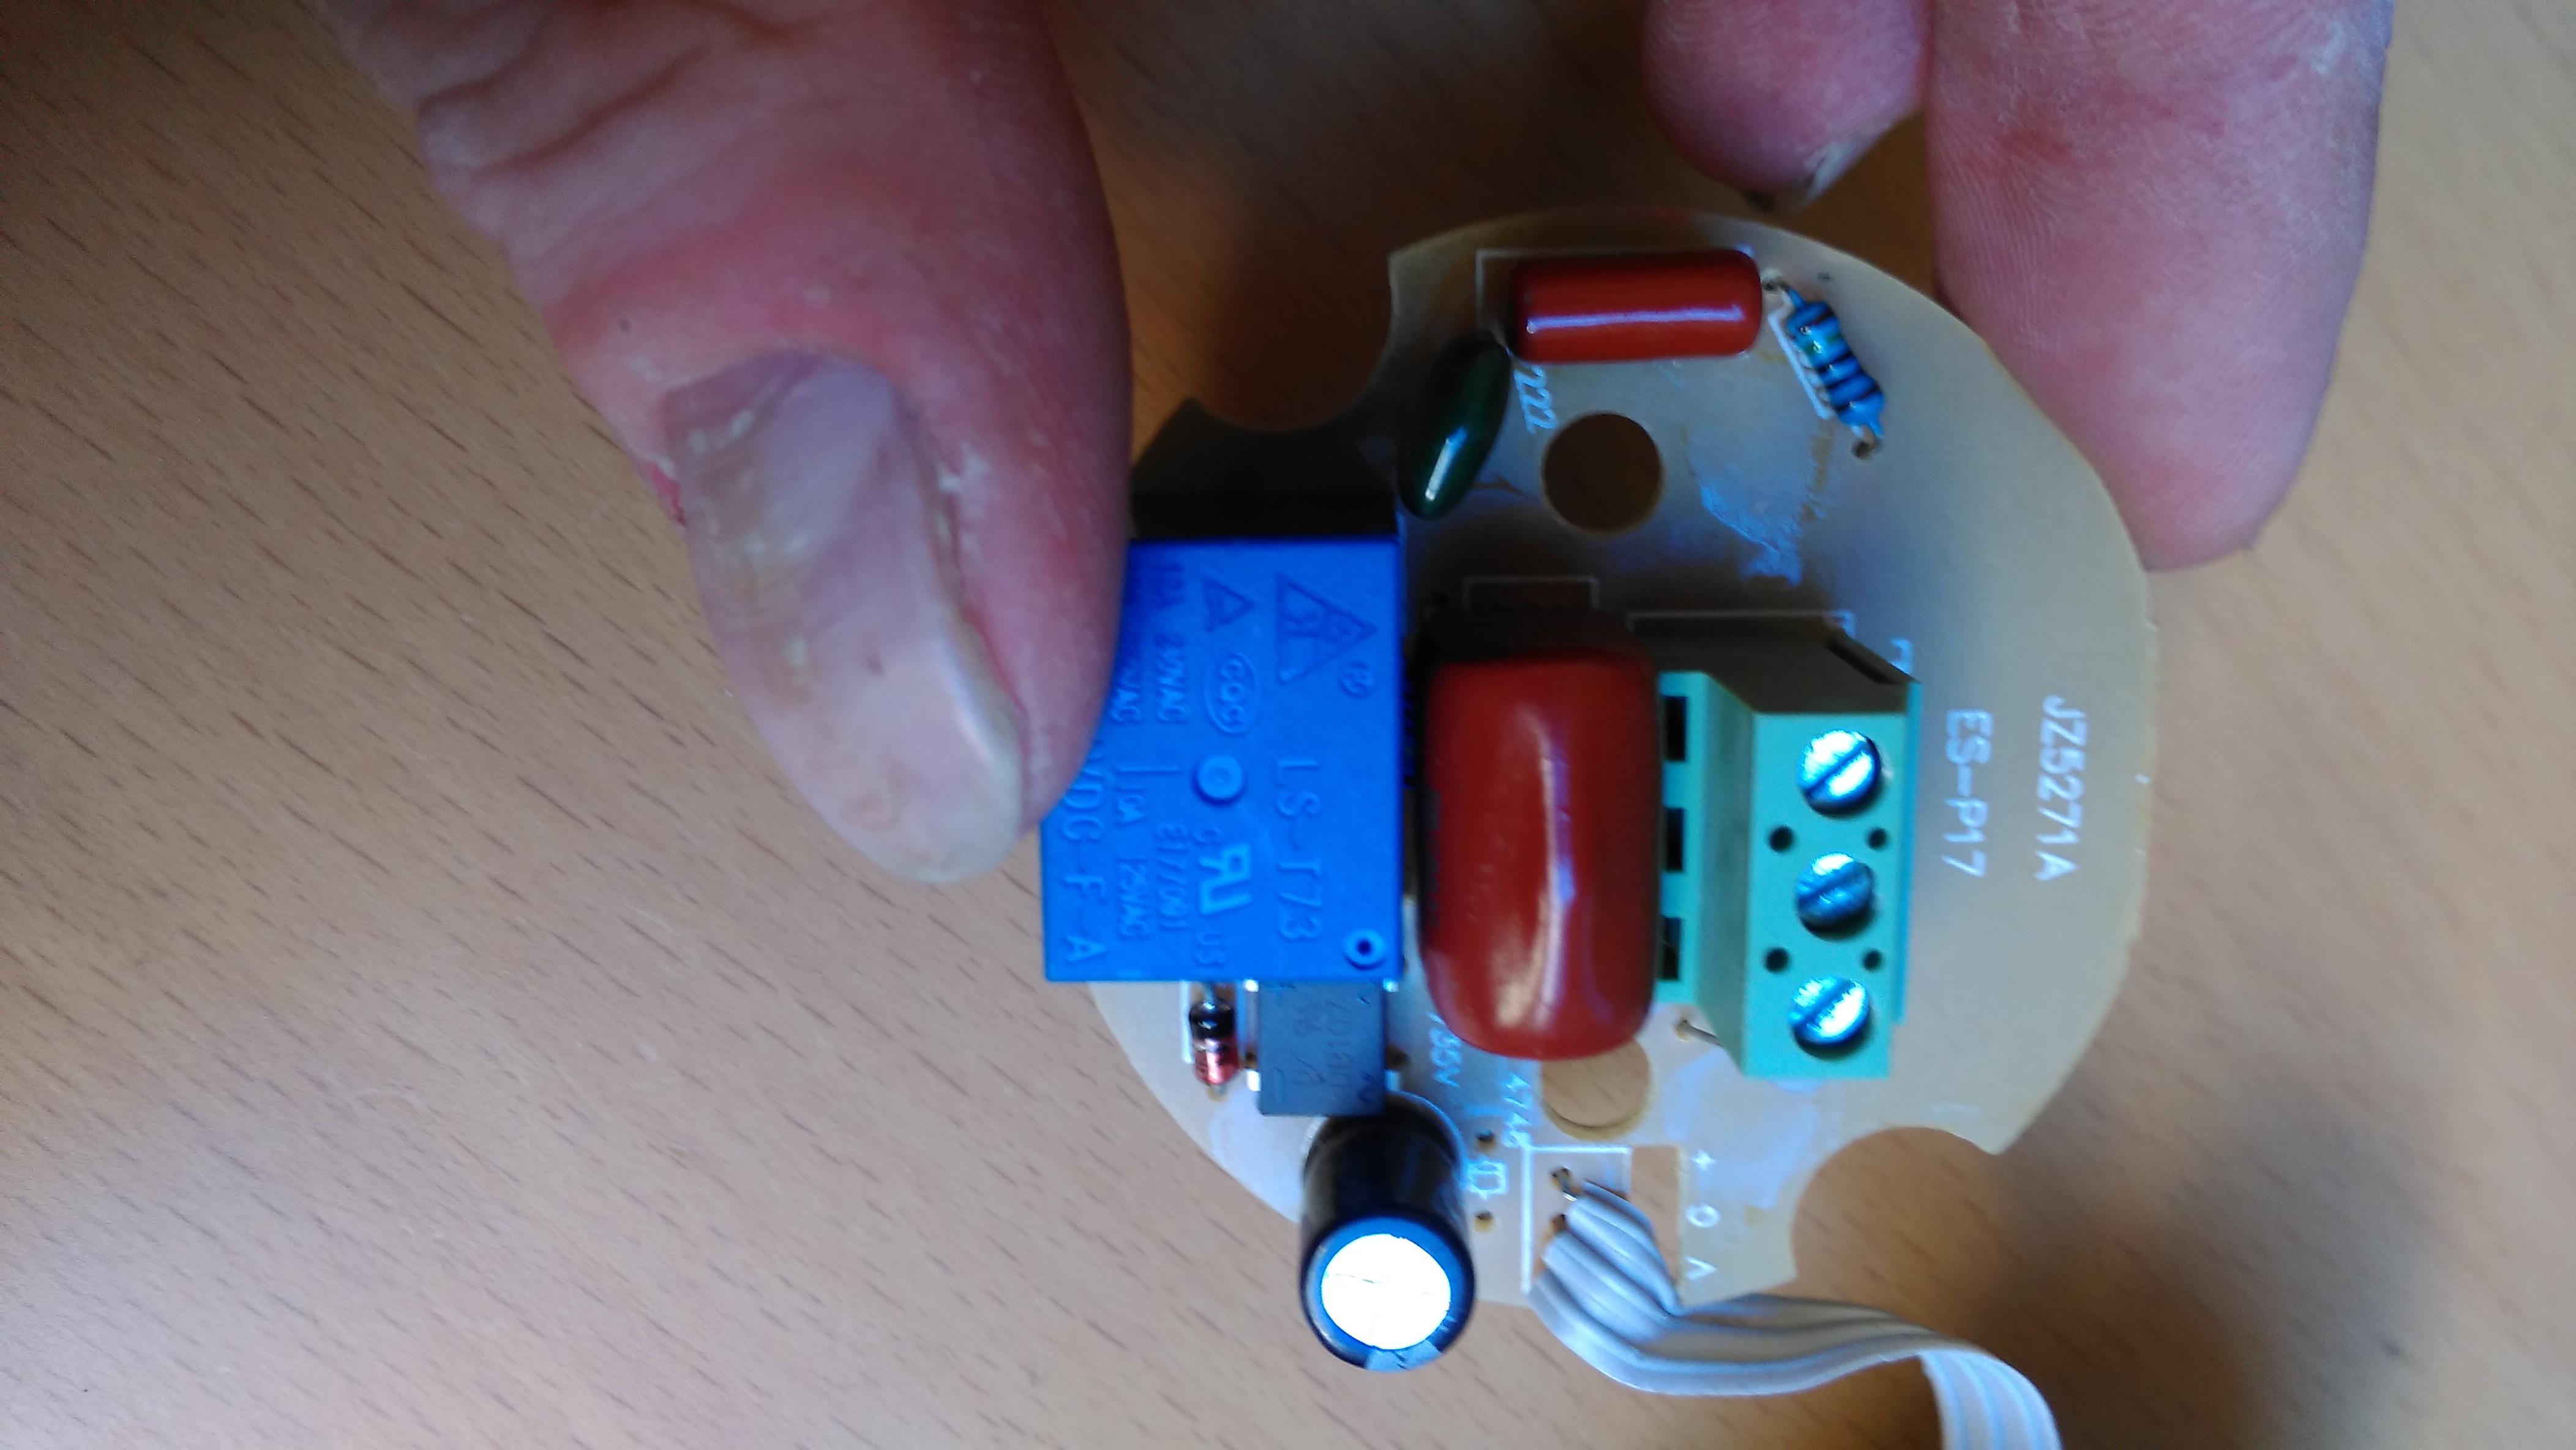
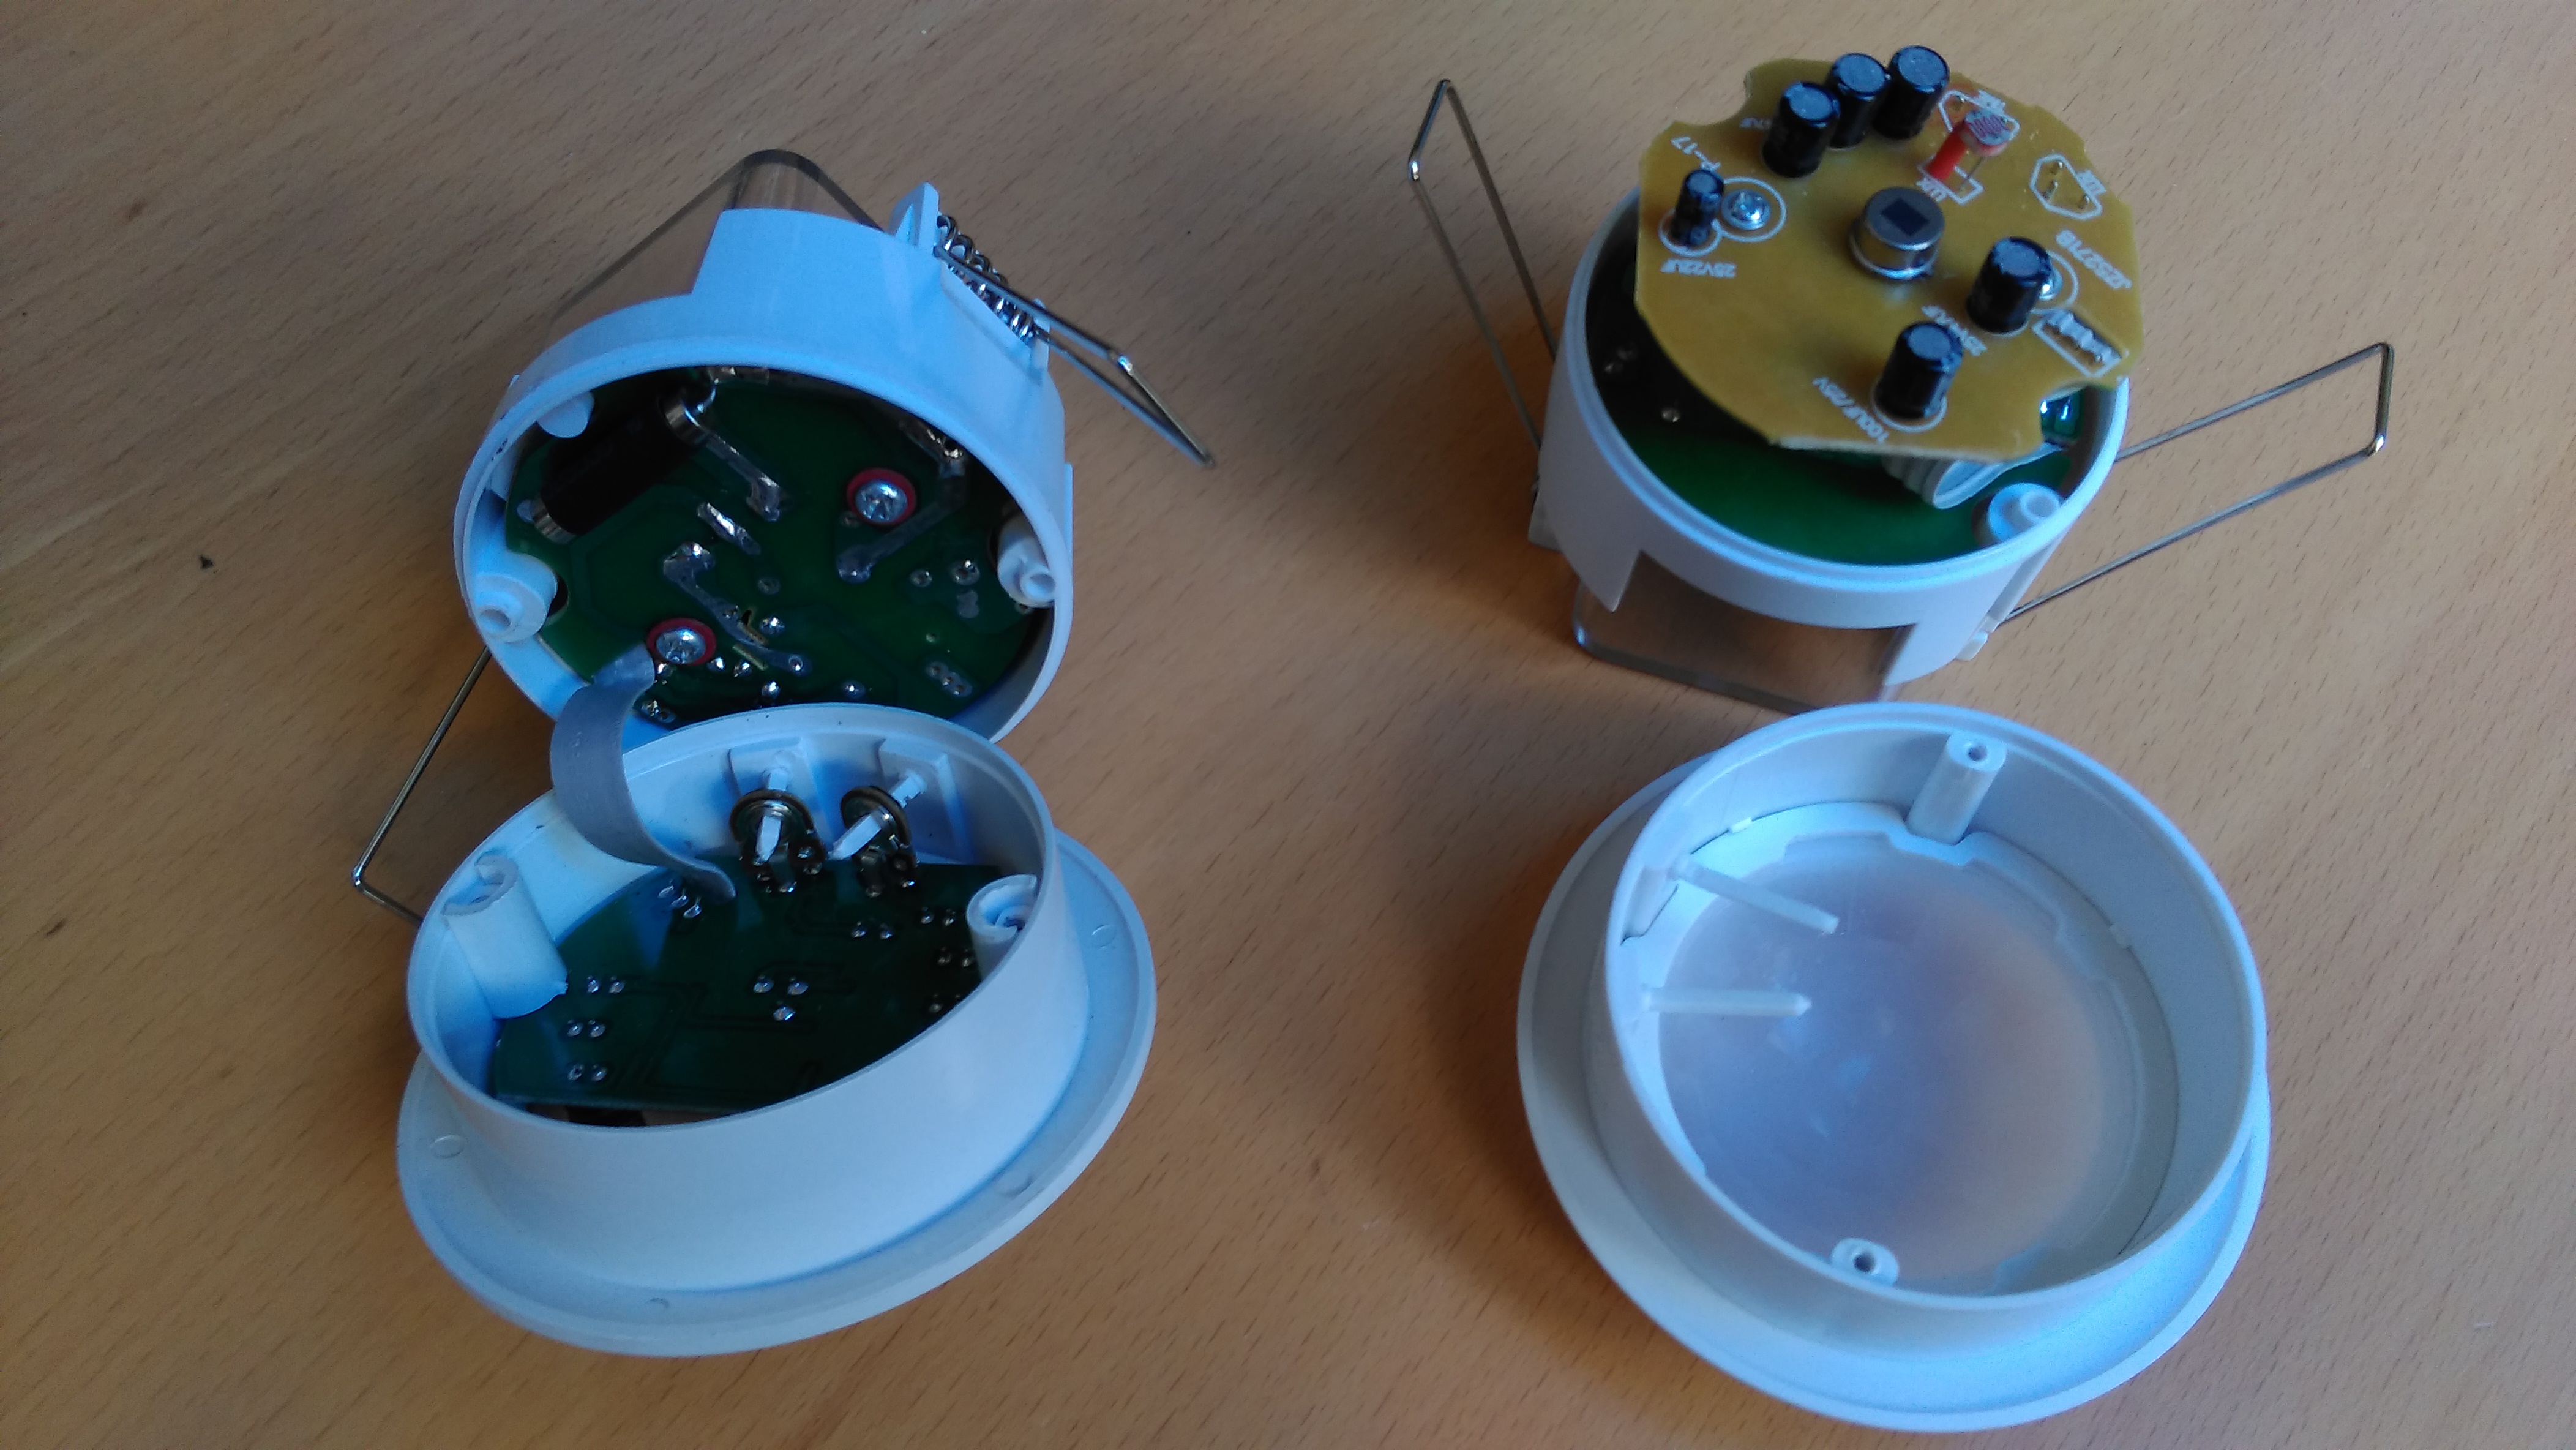
Different AC supply board this time around. Let’s take a look see what’s going on..
So capacative dropper is driving an actual bridge rectifier this time rather than four discrete diodes. Seems like there’s a lot here we don’t need….
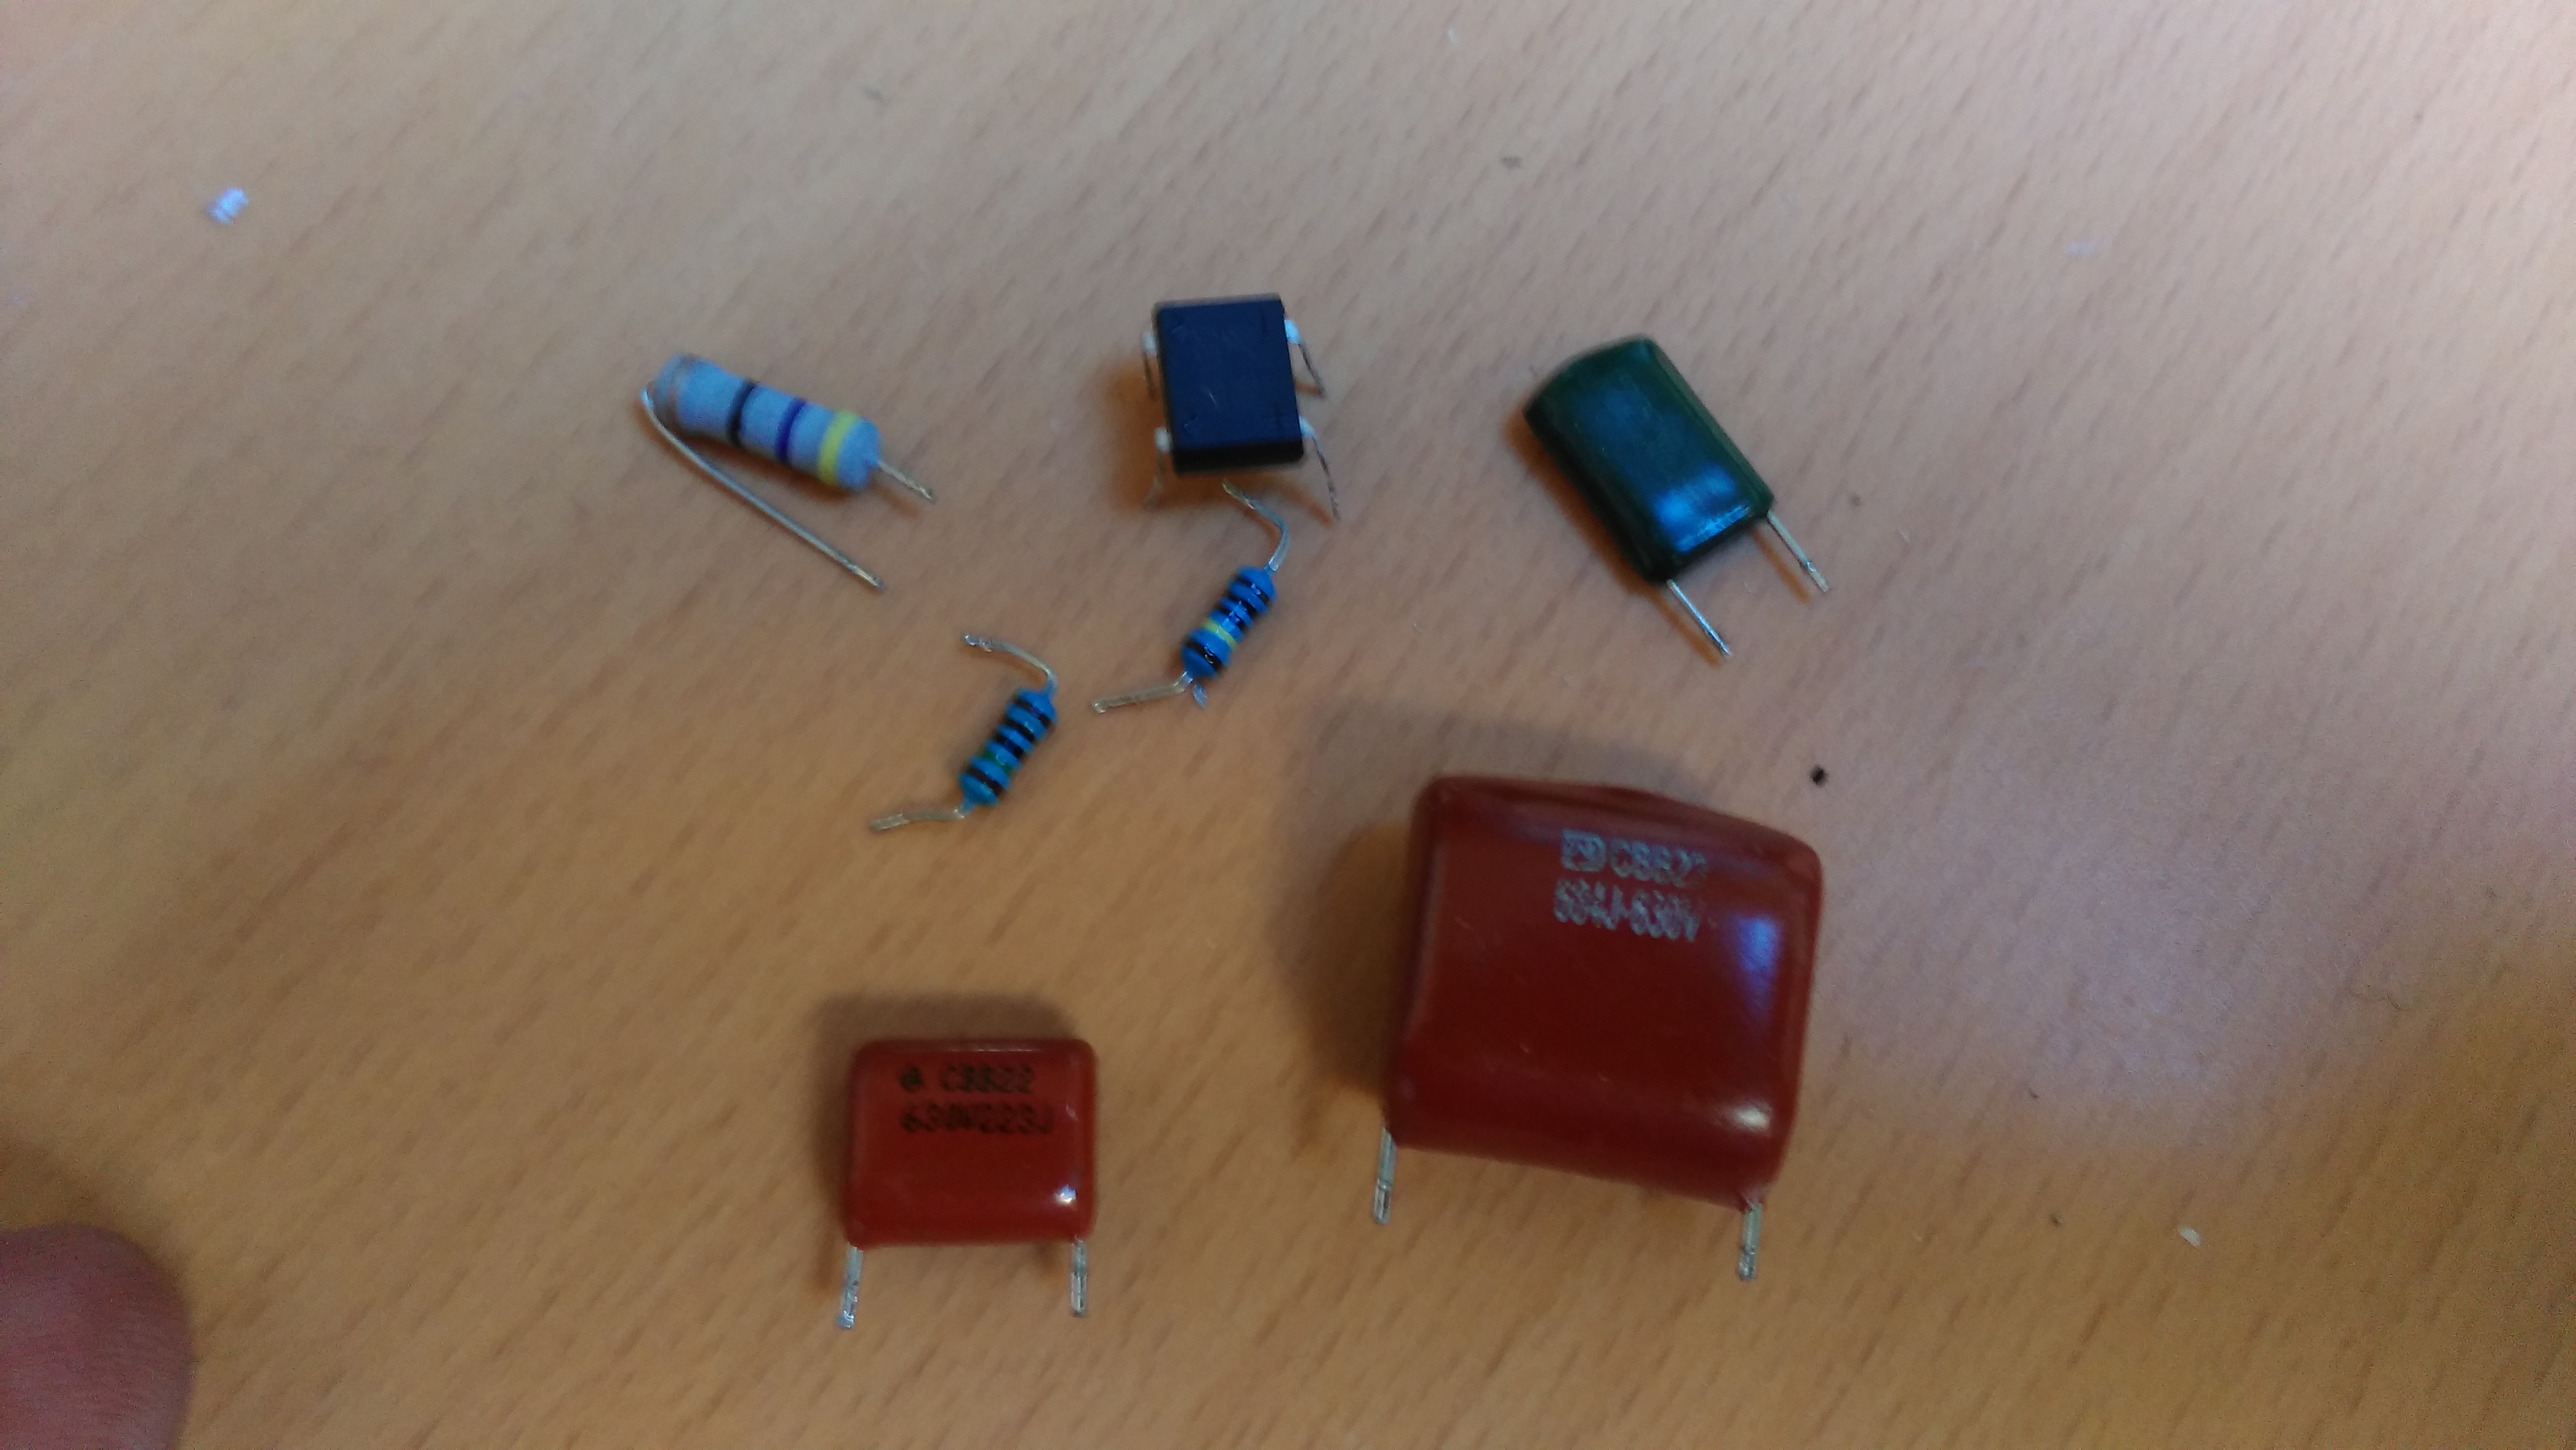
I always end up with spare bits when I take things apart….
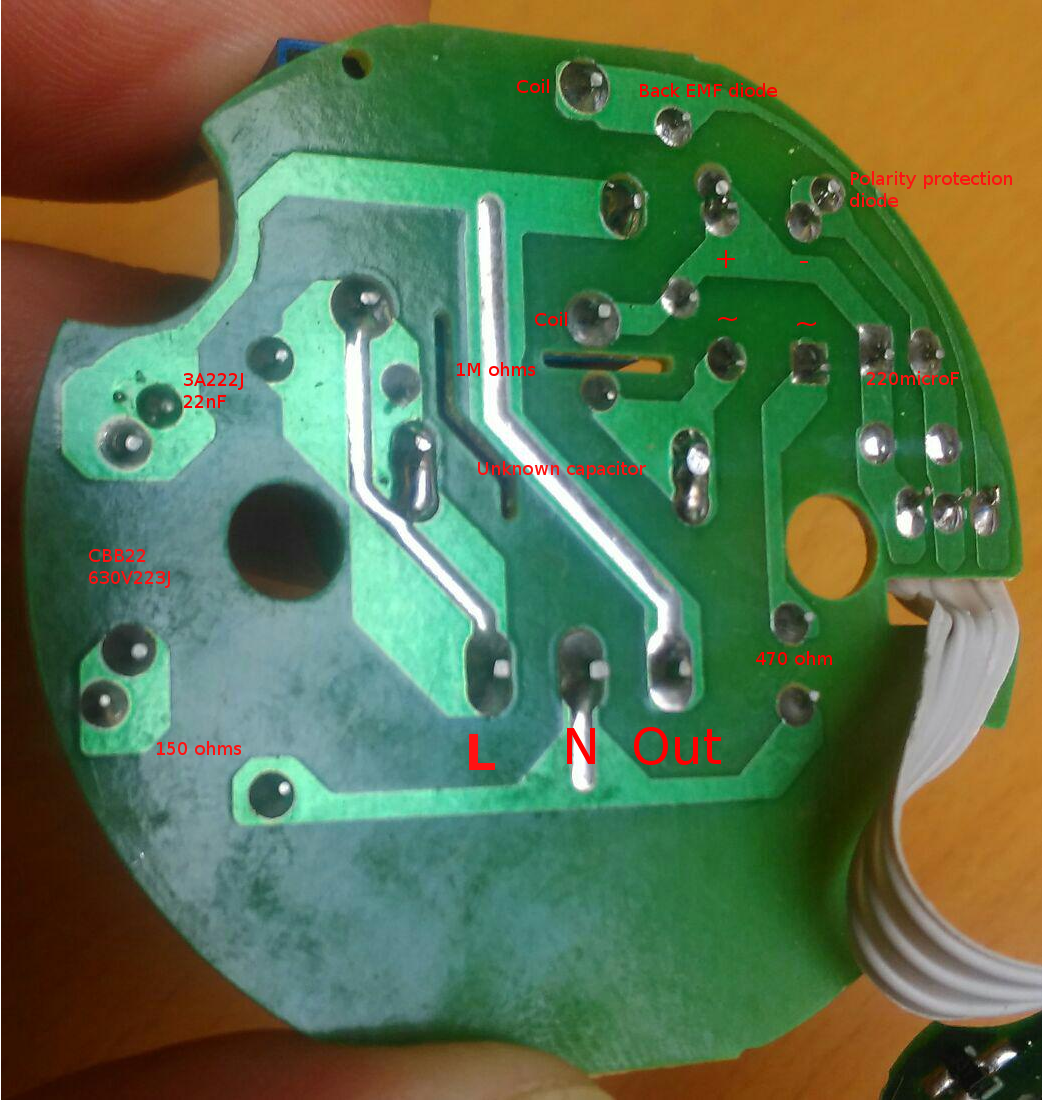
Right, so now we look like:
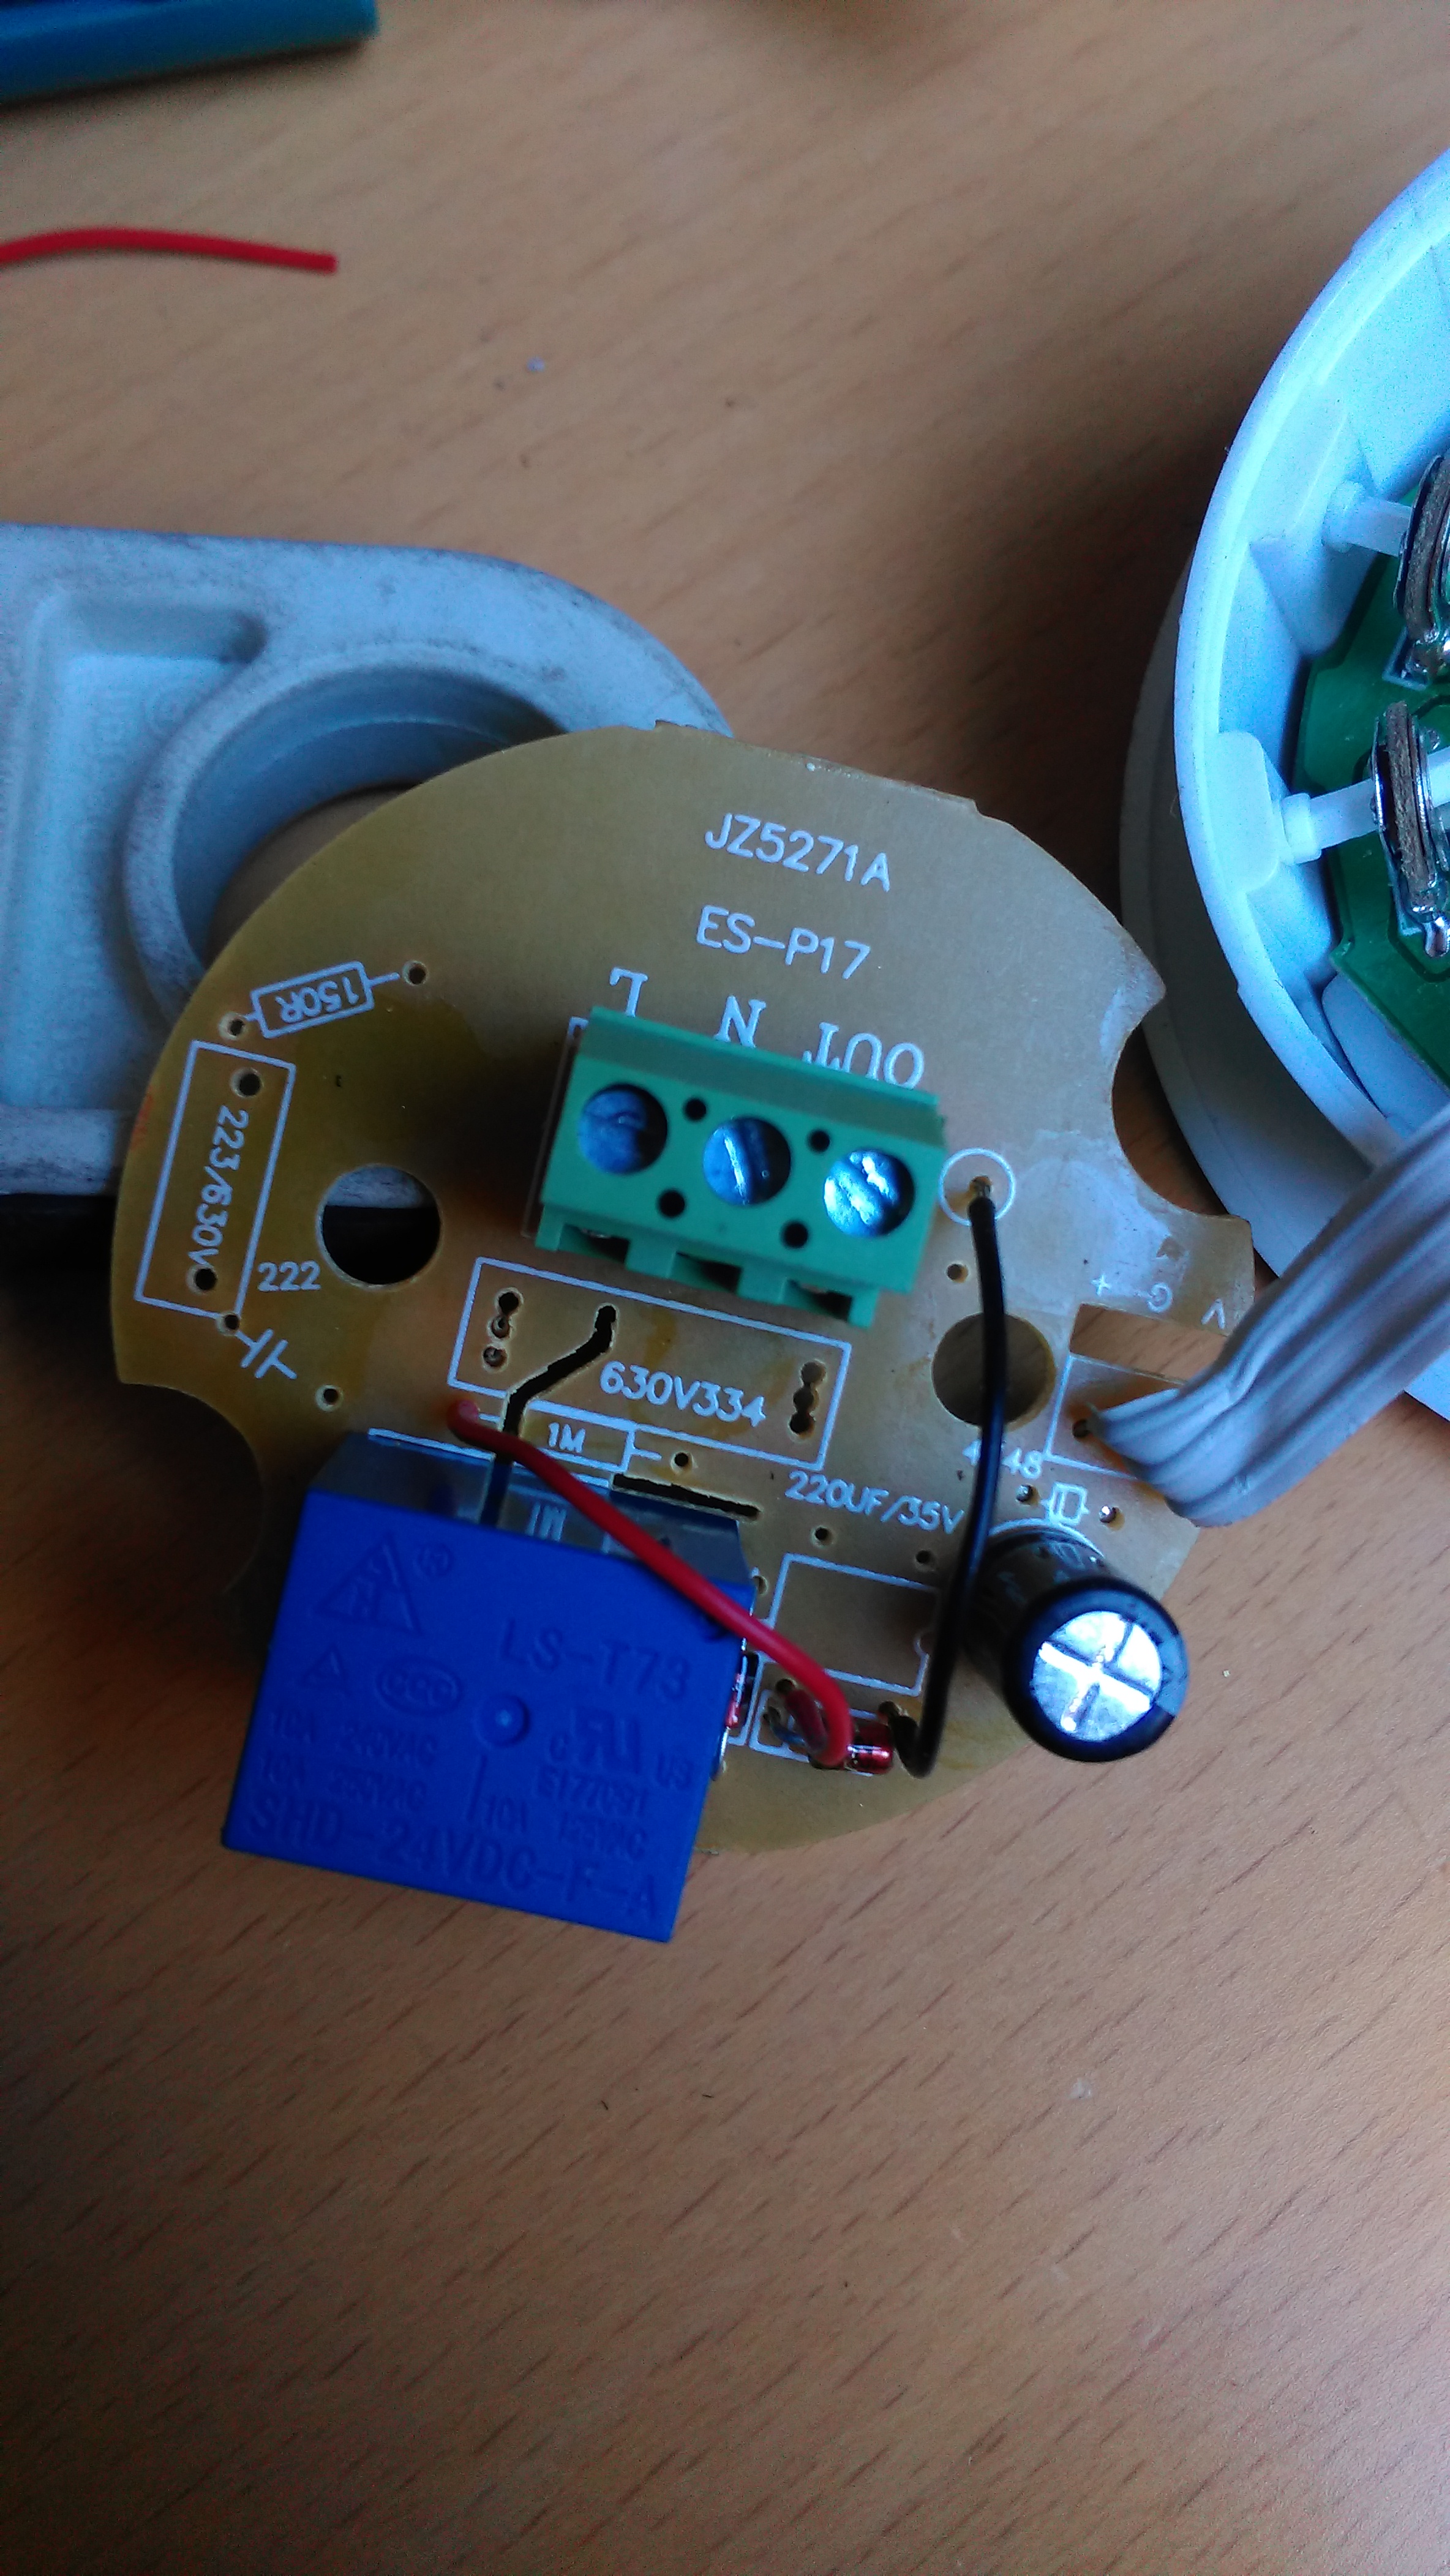
So having removed all but the diodes for protection and the capacitor for smoothing the supply, we’re left with +24v going in and a working automation PIR! I put the front board in place without screwing it in and put the spacers on the back board as it came but without the screws. We’re no longer dealing with mains voltage and the spacers keep everything sensibly… well… spaced… Best update the labelling…
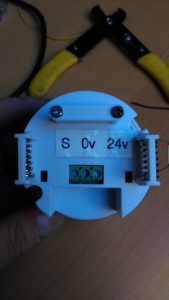
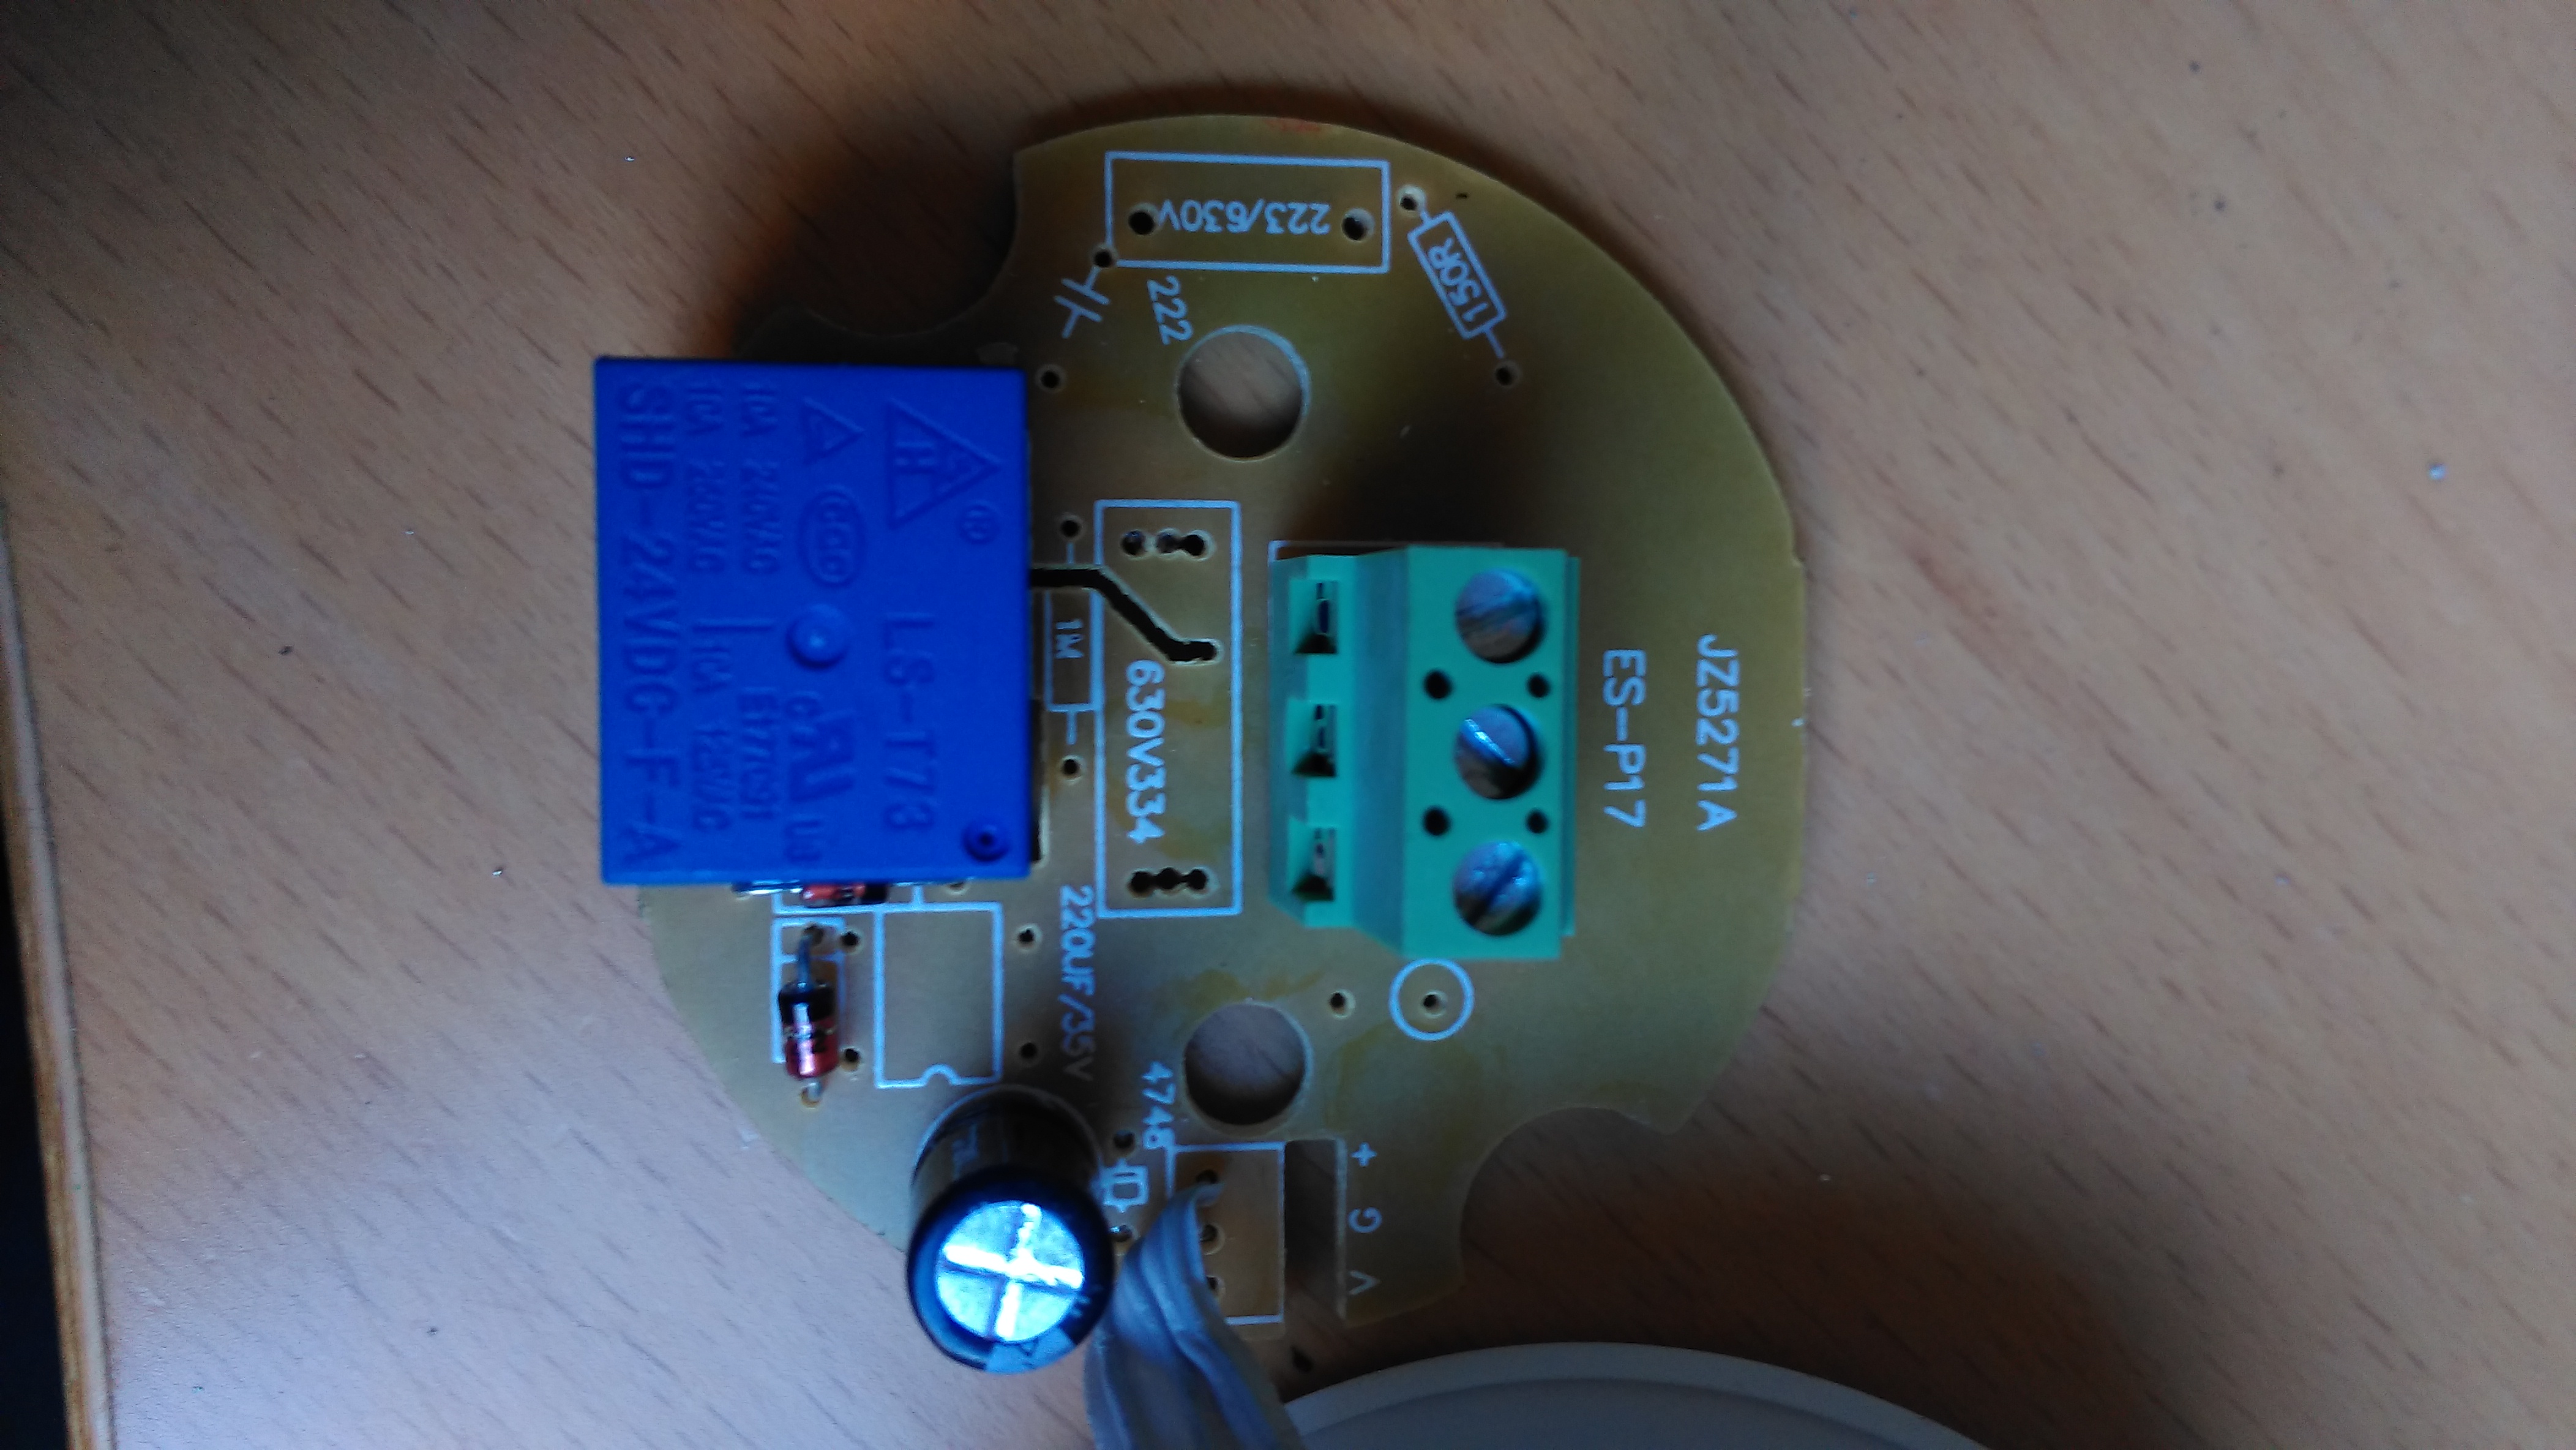
That’s a bit neater than the previous scribblings with a sharpie… 🙂
I’m hoping that step by step pictures and the diagram will make it clear how this change works. The PIR module is 24v all along, all we did was remove the AC components and drive it directly.
There doesn’t seem to be an LED on this model. The relay is triggered by dropping the signal line from the front board to 0v. It floats at +24 otherwise so technically we could lose the relay completely and drive that back to an input. I’ve not tested that so your mileage may vary.
Hopefully that update will be useful to people!
Keep hacking, Ian.
A nicely detailed hack. I swear the next time I move will likely be the last and I will be switching half my house to lower voltage based on what you have done. More home automation and voltage dropping articles please. We should convince people to have two circuits, low voltage and high voltage, the number of AC regulation that is in modern devices is unnecessary – btw this is me angling for you to write a frothy post explaining this better than my half-arsed comment 😉
Good work Ian, well done. In fact your posts changed my mind to install loxone after dumping the idea due to expensive extension and peripherals.
Could you please help clarify the wiring schematic for this PIR? which one goes to DI or AI on miniserver? Much appreciate it!
Thanks, glad to see that it’s being helpful to people 🙂 The switched 24+ output marked S would be the one that goes back to the miniserver input.
Ian.
Hi Ian,
Was about time when I did the PIR modification for my Home Automation project only to realise that your original post regarding PIRs on hackaday.io is now missing all the pictures. Is there any chance those pictures can be restored or if any pdf document be made available for download? I desperately need that tutorial as I have 25 of the old PIRs to modify for my project which are also now too late to be swapped over with new ones like in above tutorial.
Have a good weekend.
Hi!
Sorry about the site issues, we’ve hopefully sorted the issues out now. The original post can be found at http://lamm.space/2015/04/14/is-there-anybody-there-click-once-for-yes/ complete with images.
Good luck with your hack!
Ian
Many thanks Ian, Have a very happy new year!!
Hello Ian,
Thank you so much for the info! I love these kind of “hacks”.
Since that seller doesn’t ship to Belgium, I looked elsewhere and found this: https://www.aliexpress.com/item/2016-Brand-New-1-pcs-360-Degree-Mini-Recessed-PIR-Ceiling-Occupancy-Motion-Sensor-Detector-Switch/32758291018.html
It looks more or less the same, but there seem to be differences. Do you this this modification will be possible?
I have ordered a couple to verify, but I’m afraid I don’t have the same skills as you when the internals are not the same 🙂
Grtz!
Ruben
Hi Ruben,
I’ve been working with Malc from hackaday.io on another model in addition to the two designs I’ve already converted. Best thing to do is to post some photographs of the internals, high resolution photographs of the circuit boards top and bottom and I’ll see what I can do. Some will be straight forward, others may be more complicated.
Regards, Ian.
I received them today and opened one up. Looks really similar! It also comes with a 24v relay.
Here are the pictures: http://imgur.com/a/RPeKU
Just found your new post and to my surprise it is exactly the same one! Thank you!
https://lamm.space/2017/02/28/presence-sensors-again/
Hi Ruben,
Ace! Glad to see the updated version is being helpful. Looks like yours also has a fuse on it.
Ian
I am also liking the hot melt glue to support the ribbon connector!
Hi Ian,
I am about to pull my last few hair out too due to the PIR above. Ecstatic after your hack, I mass converted around 17 of the PIRs for me new home but has hit the brick wall yet again!!
None of hem works! For some reason none function when connected to wires from Loxone Extension. The wires been double, triple and quadruple checked and found correctly connected. Have checked the components to be taken out of PIR several time and not missed any. Have rewired the 2 wires as shown in your second last picture as well. Is there anything in the module setting I am missing or just been unlucky in so many PIRs? Please help! All works well with phone app.
Seems PIR been a hot topic lately 🙂 so many PIR hacks.
Thanks in advance