Blast gates for controlling air flow are not a new thing but buying them off the shelf can be an expensive shopping experience, plus they’re only available in fixed sizes. I’m using 110mm UK drain pipe which there certainly isn’t a suitable gate for.
Clearly any self respecting woodworker has the skills to be able to build their own. I took some inspiration from Jay Bates and Marius Hornberger both of whom have brilliant YouTube channels that you should subscribe to.
But this is a hackspace blog post, so clearly that’d be a bit too straight forward… how about if we laser cut them?
That’s heading more in the right direction. That’s a pretty nice design as a starting point. I ended up having to tweak the design to account for a slightly different diameter pipe fitting (mainly because I forgot to measure it before going to the hackspace and guessed wrong). But neat trick if you happen to do this, cut another one the right size and then when it’s finished very carefully lift it out of the cutter without moving the board you cut it out of, now drop your badly sized one in the hole and re-cut. Obviously that only works if it’s too small, or you have a magic laser that glues bits back on… no, wait, that’s a 3d printer.
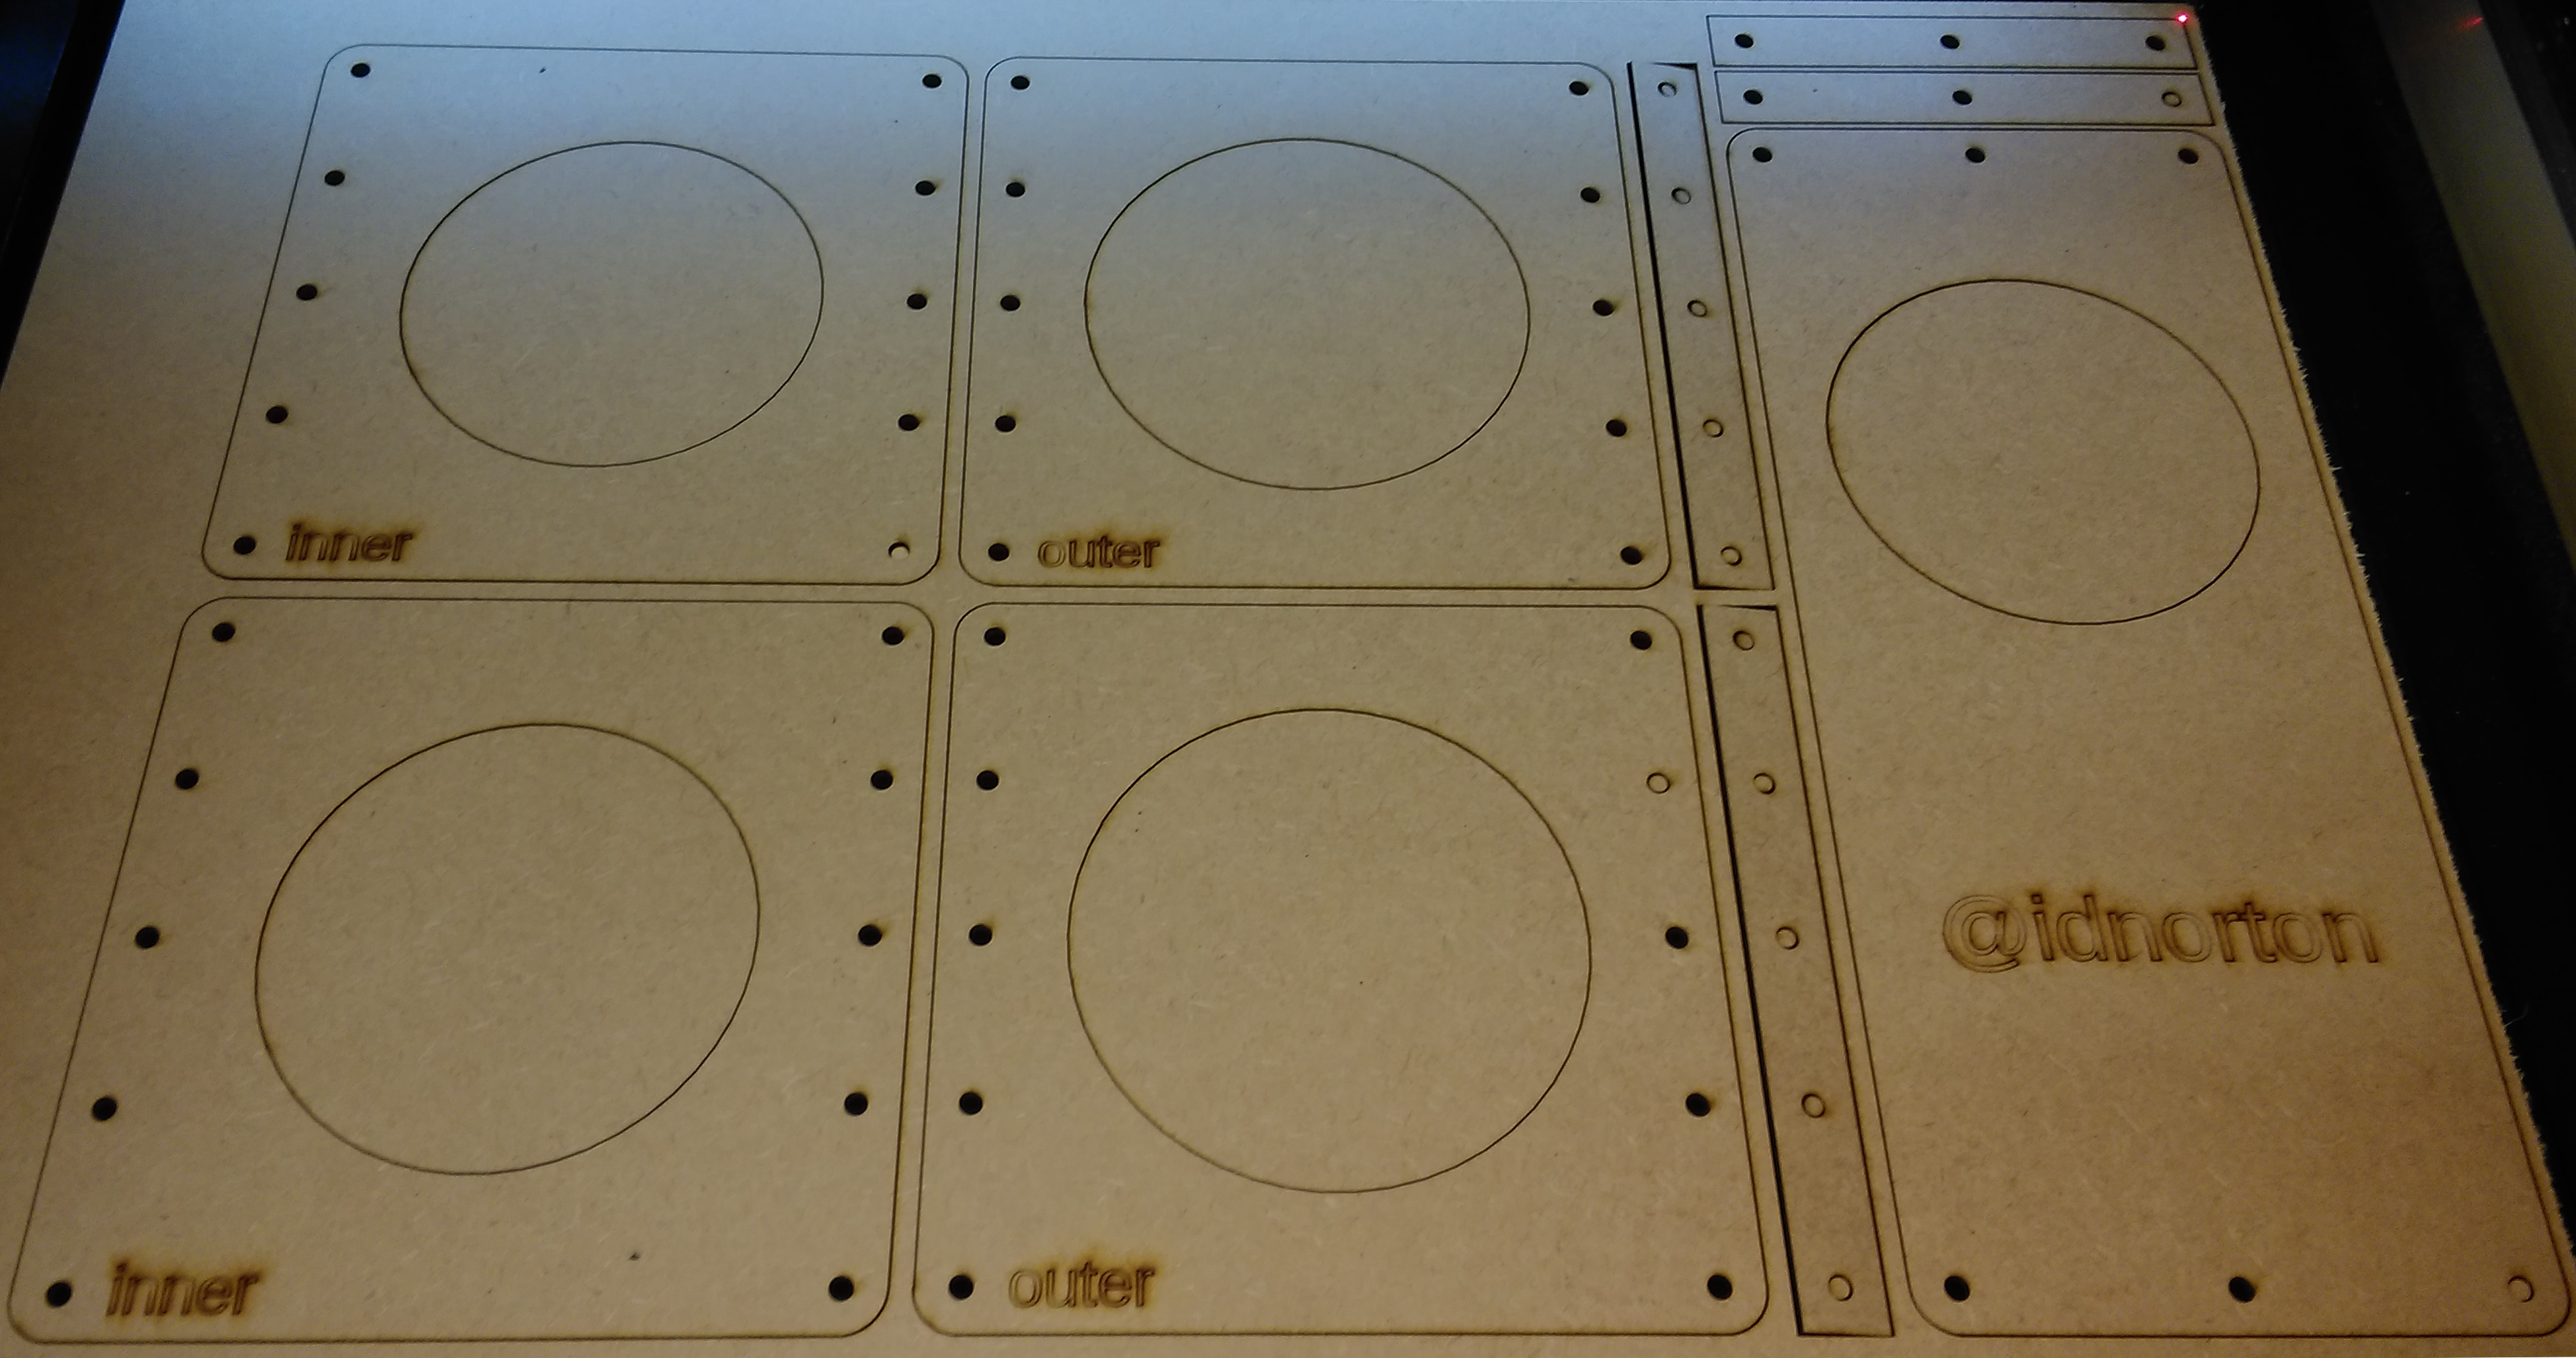
So our Blast Gate Mark 1 is available over on GitHub which looks a bit like this:
Parts list:
- 10 x M5 x 25mm bolts http://www.ebay.co.uk/itm/221307549544
- 6 x M5 x 14mm bolts http://www.ebay.co.uk/itm/221307549544
- 16 x M5 nylock nuts http://www.ebay.co.uk/itm/320901621860
- 42 x M5 washer http://www.ebay.co.uk/itm/221073171961
- 1 x A2 (600mm x 400mm) 3mm laser safe MDF https://www.kitronik.co.uk/3211-3mm-laser-compatible-mdf-600mm-x-400mm-sheet.html
- 1 x FloPlast SP124 Single Pipe Coupler Black 110mm http://www.screwfix.com/p/floplast-sp124-single-pipe-coupler-black-110mm/62966
You’ll obviously need a laser cutter, we always recommend those awesome guys at Just Add Sharks because they rock!
Assembly notes:
- The shorter bolts fix the handles to the gate
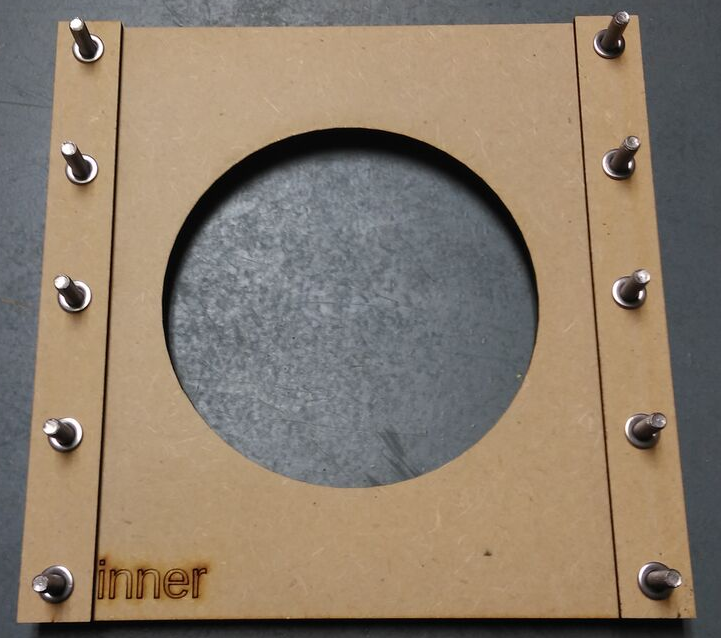
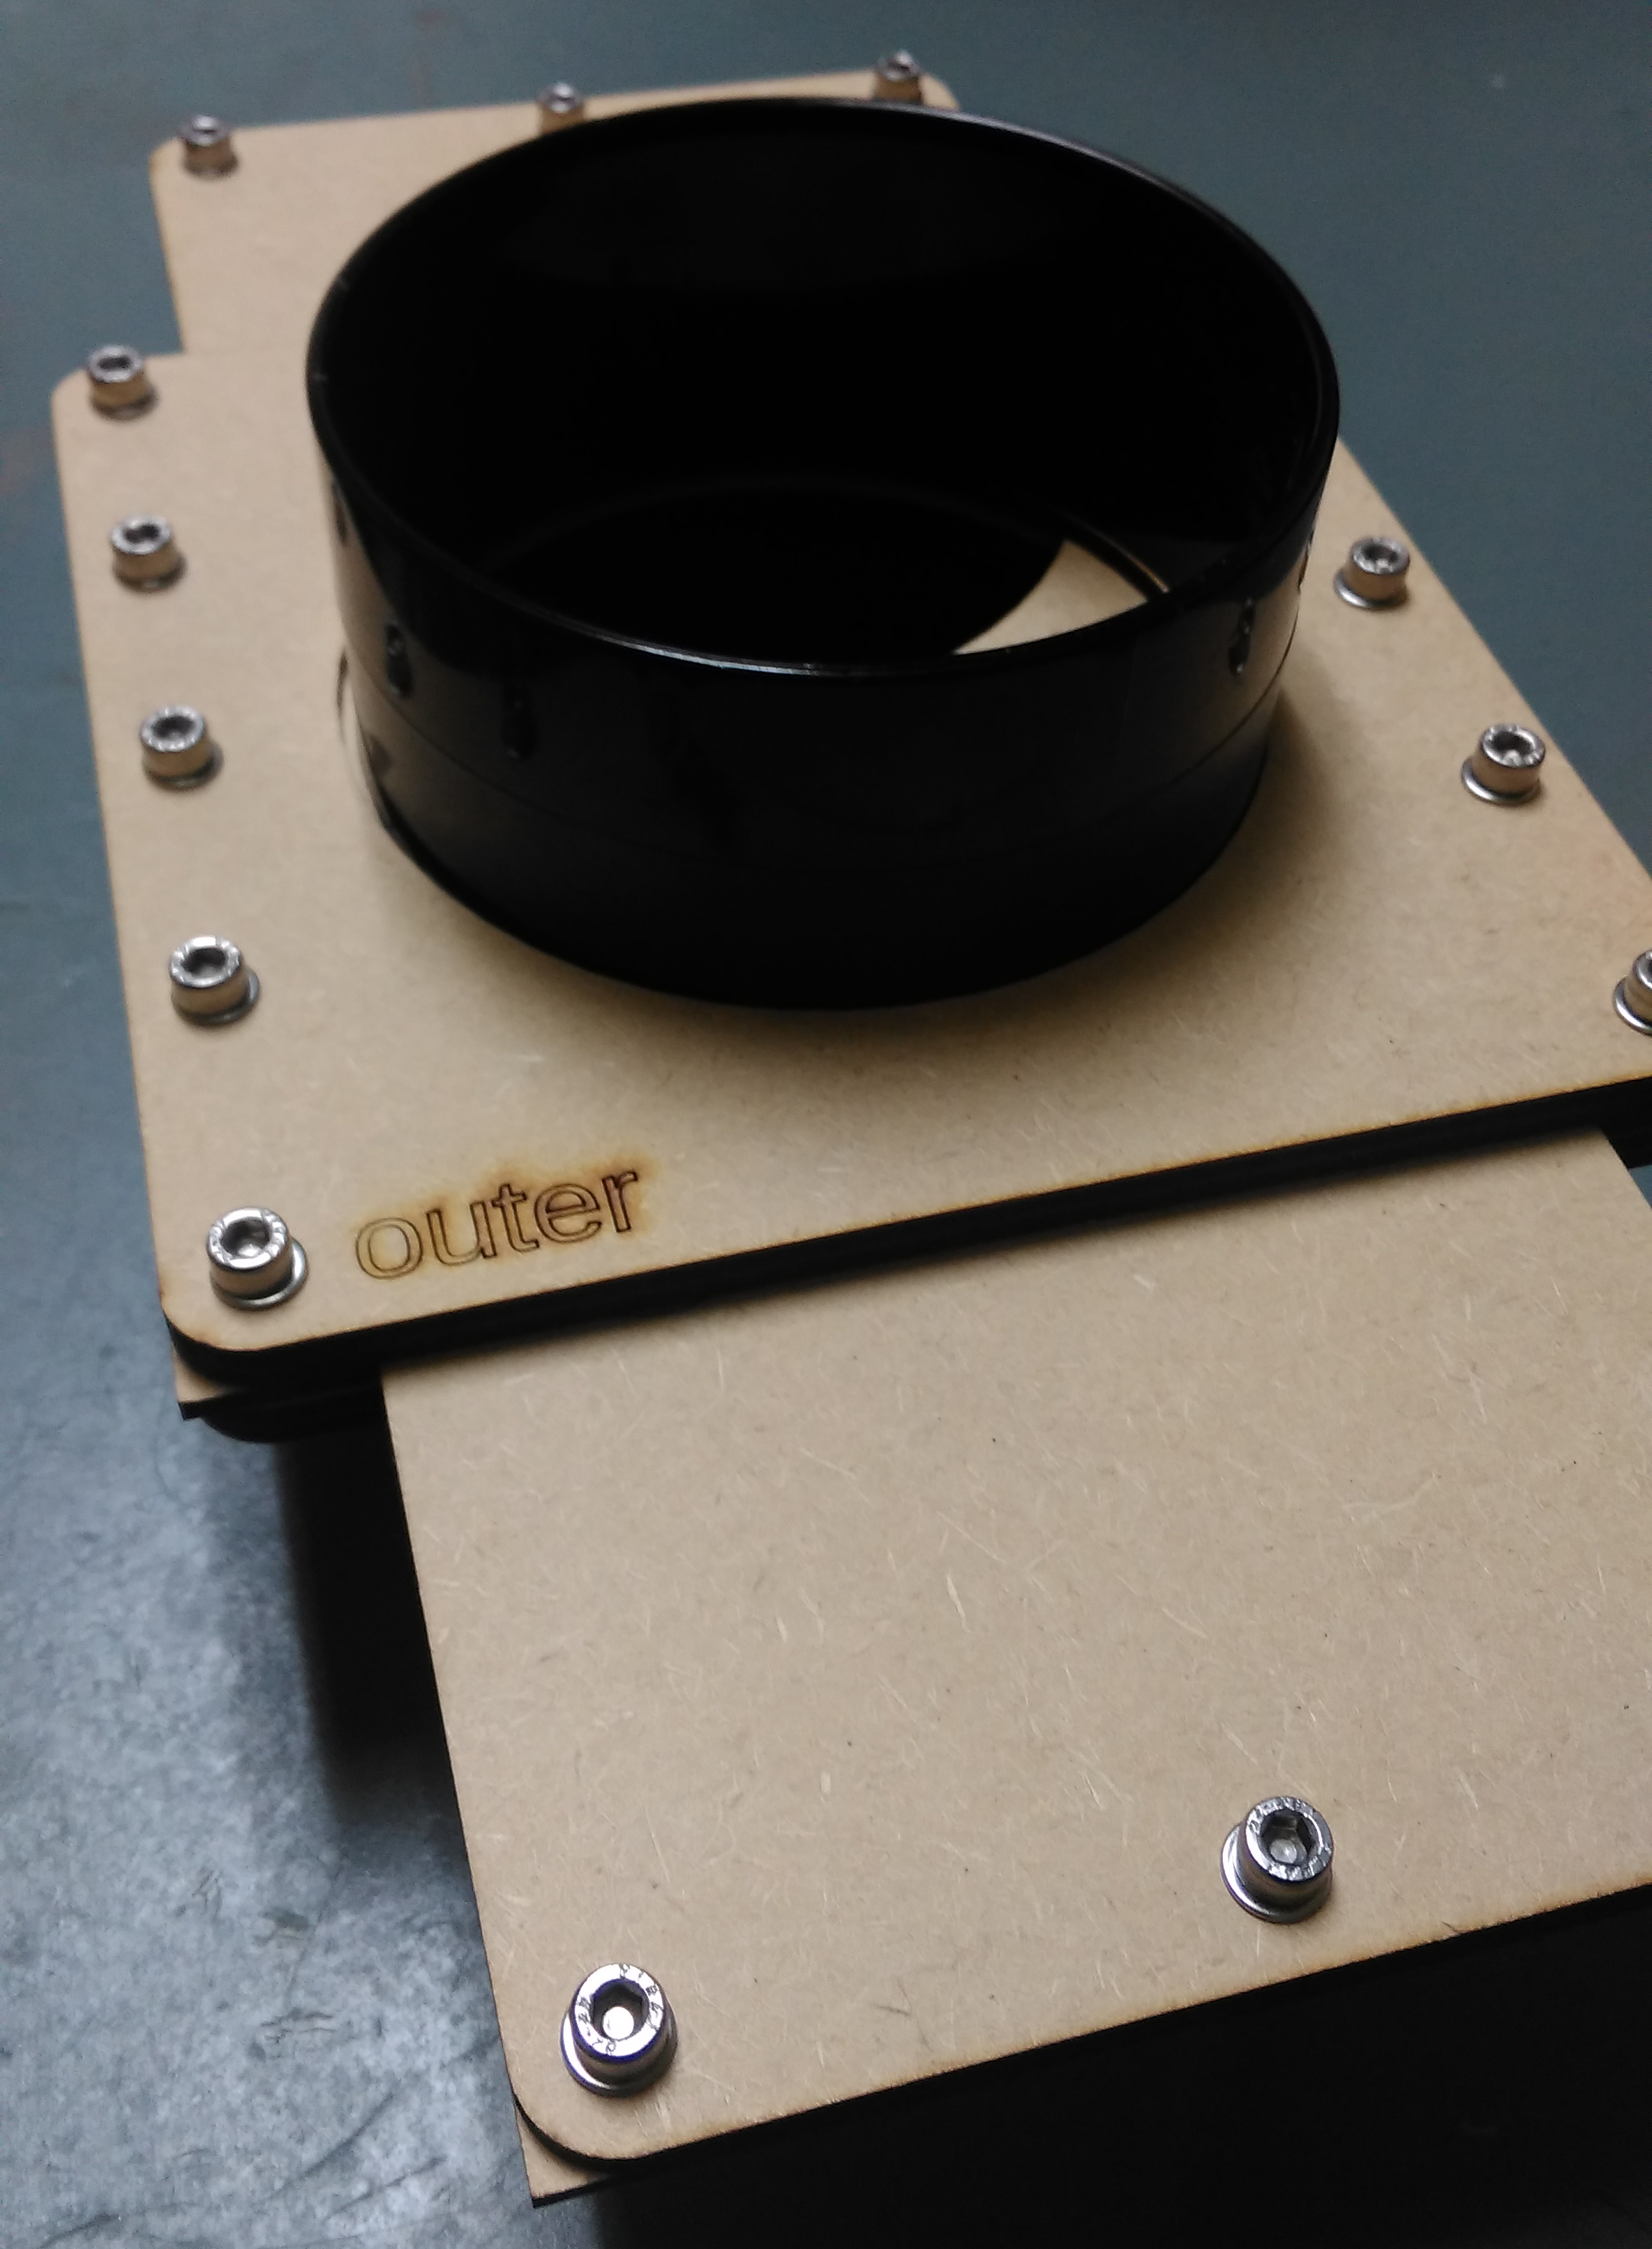
- Squares with the larger hole go on the outside
- The tricky bit is putting all your gate bolts in, adding the side strips, adding a washer and then adding your second set of gate pieces
This is important, don’t over tighten this or your gate won’t side. I recommend the use of a cordless drill with torque setting that you can wind right down to low. As long as you can’t rotate them by hand, they are tight enough.
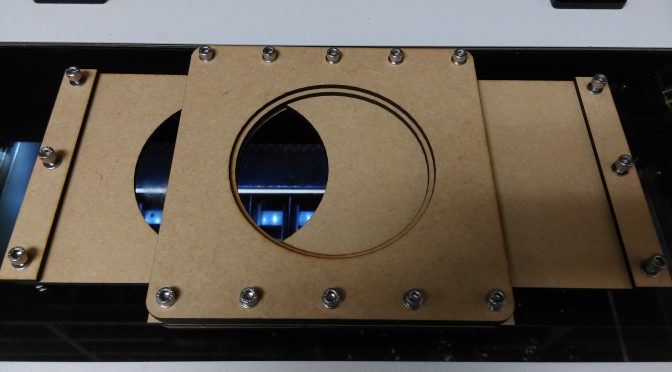
Having assembled your gates, you should have something that looks like the header picture above. Now we need to cut the pipe fitting in half and attach it to the gate. Safely cutting the plastic coupler in half without a big enough lathe is a hard thing to achieve, so having had a think about how to do this I came up with something that will undoubtedly make some people twitch like crazy:
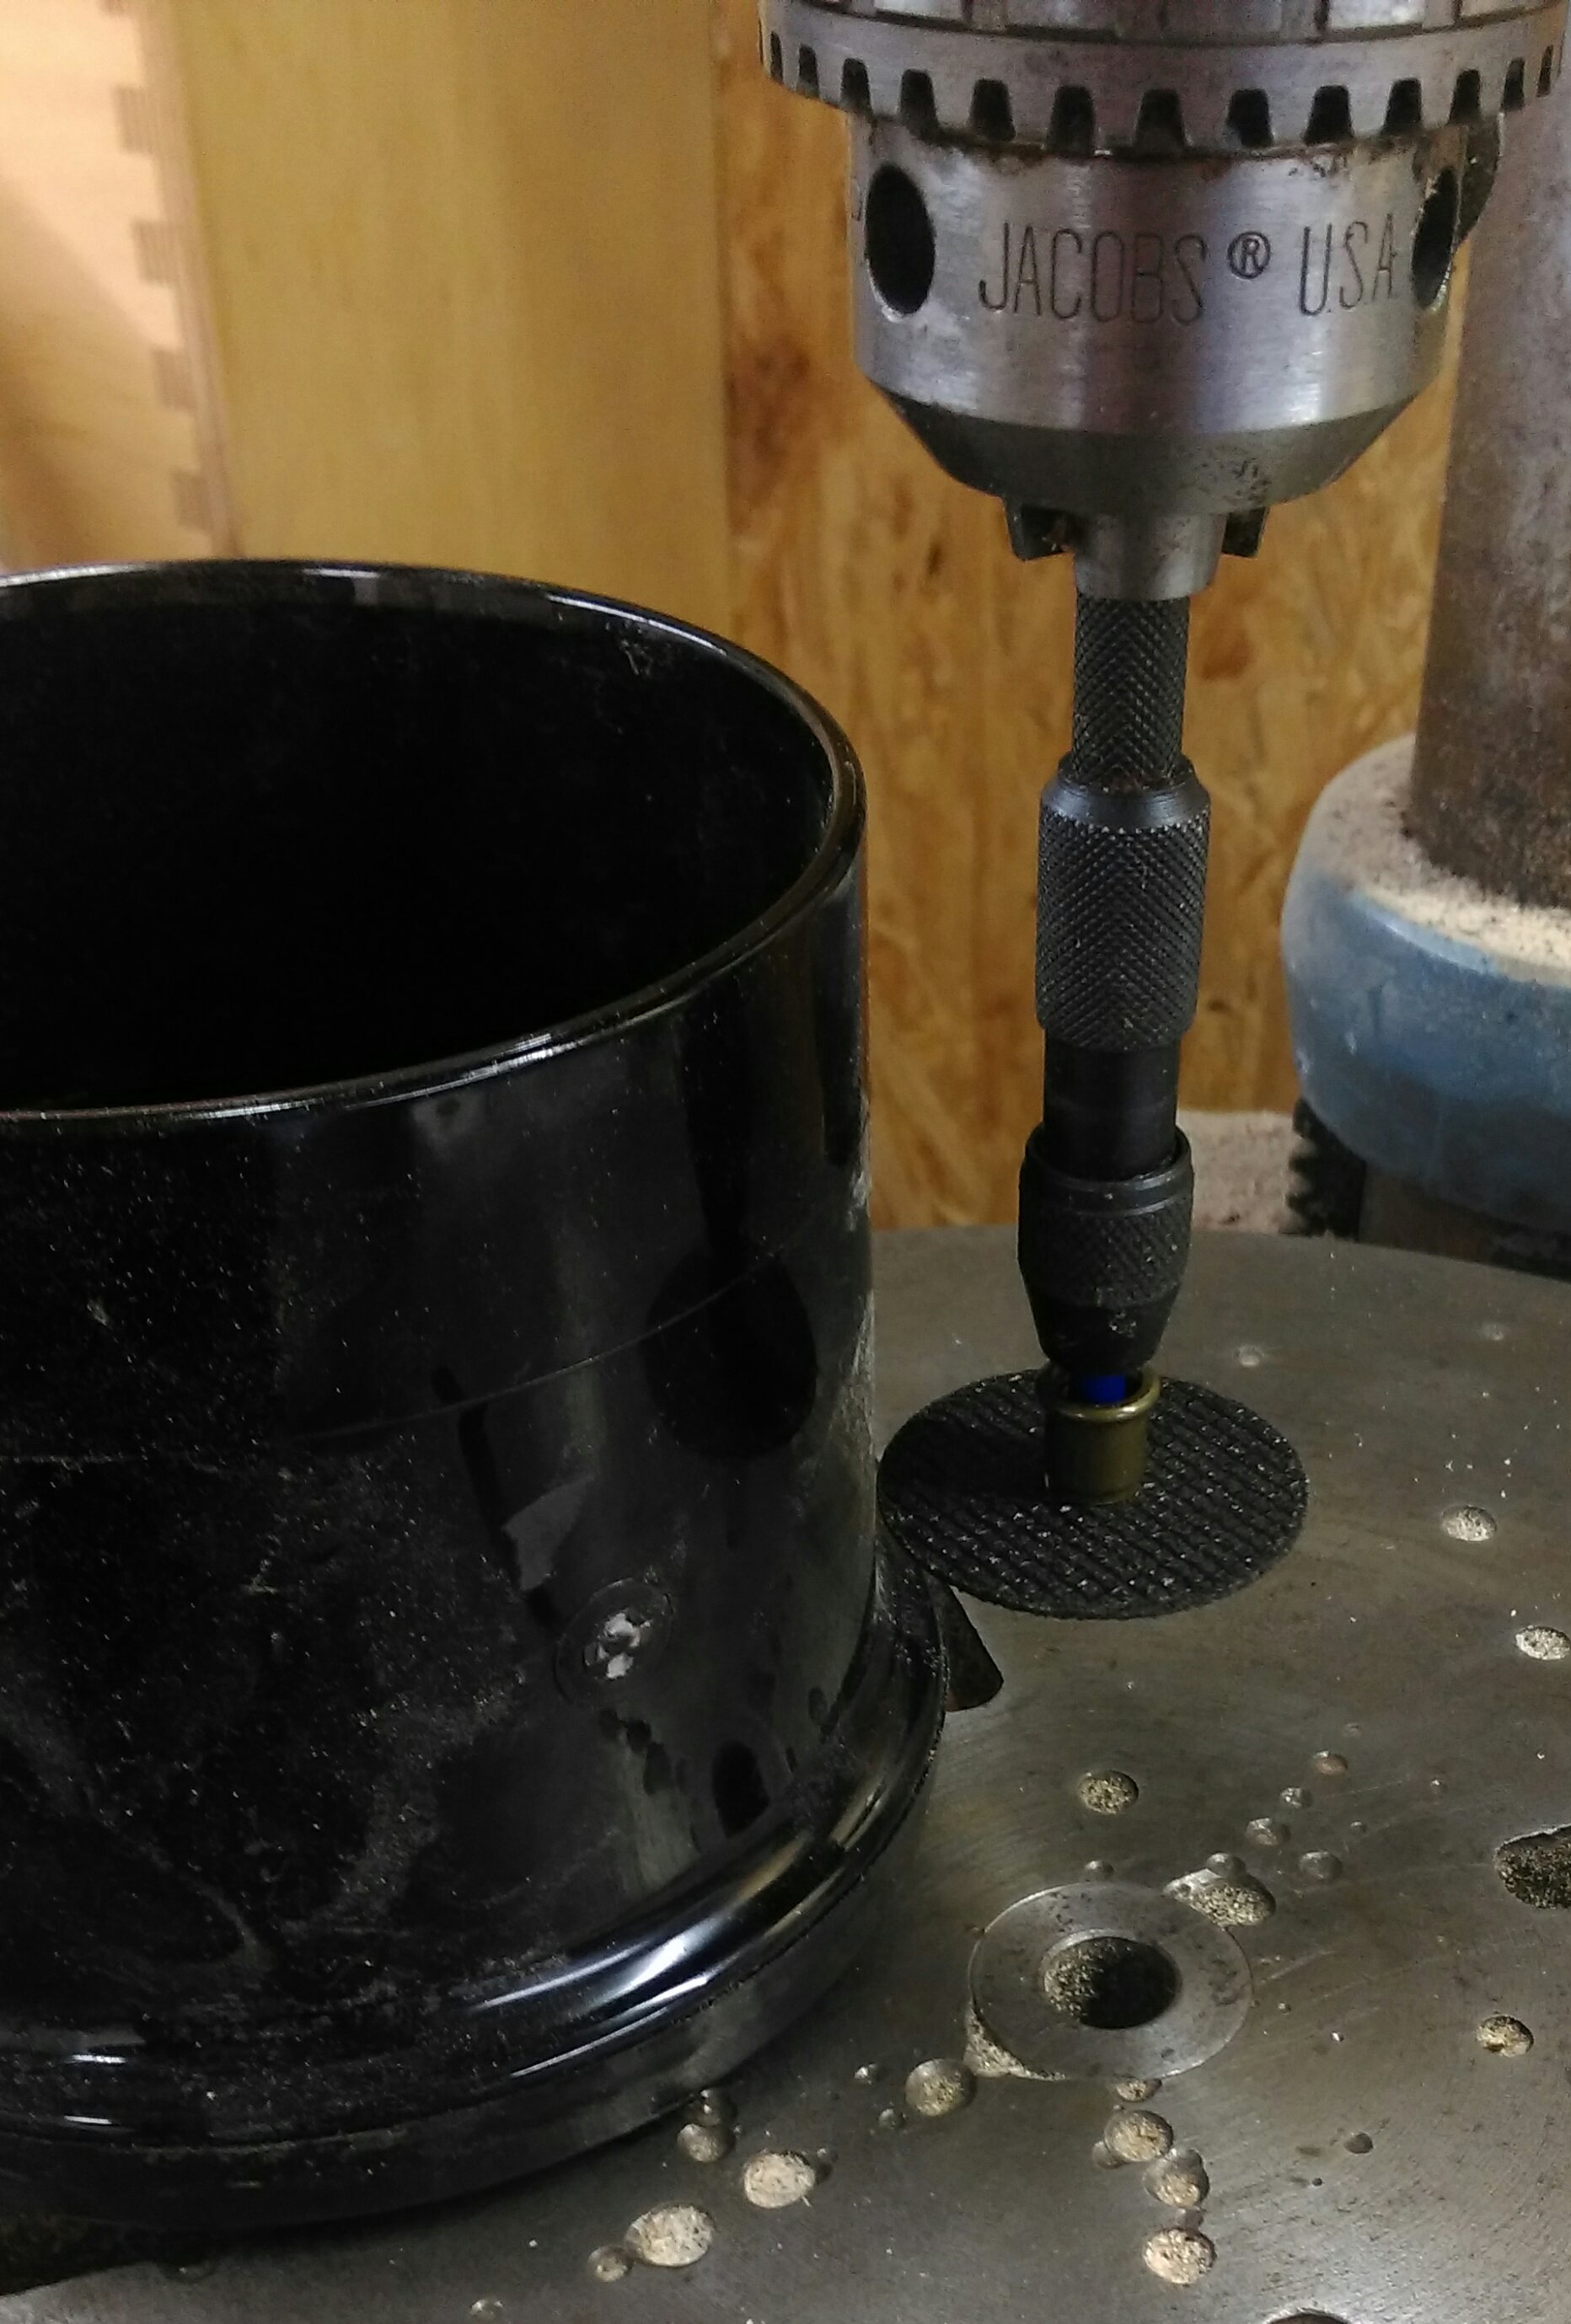
That’s a Dremel speedclic plastic cutting wheel on an arbor, in a pin vice, in a pillar drill, yes. I did warn you. A safer way to achieve this would be to use a lathe if you have one big enough (the pipe couplng for this goes around the chuck of my small lathe). This technique gives accuracy whilst being the safest I could think of with the equipment at hand.
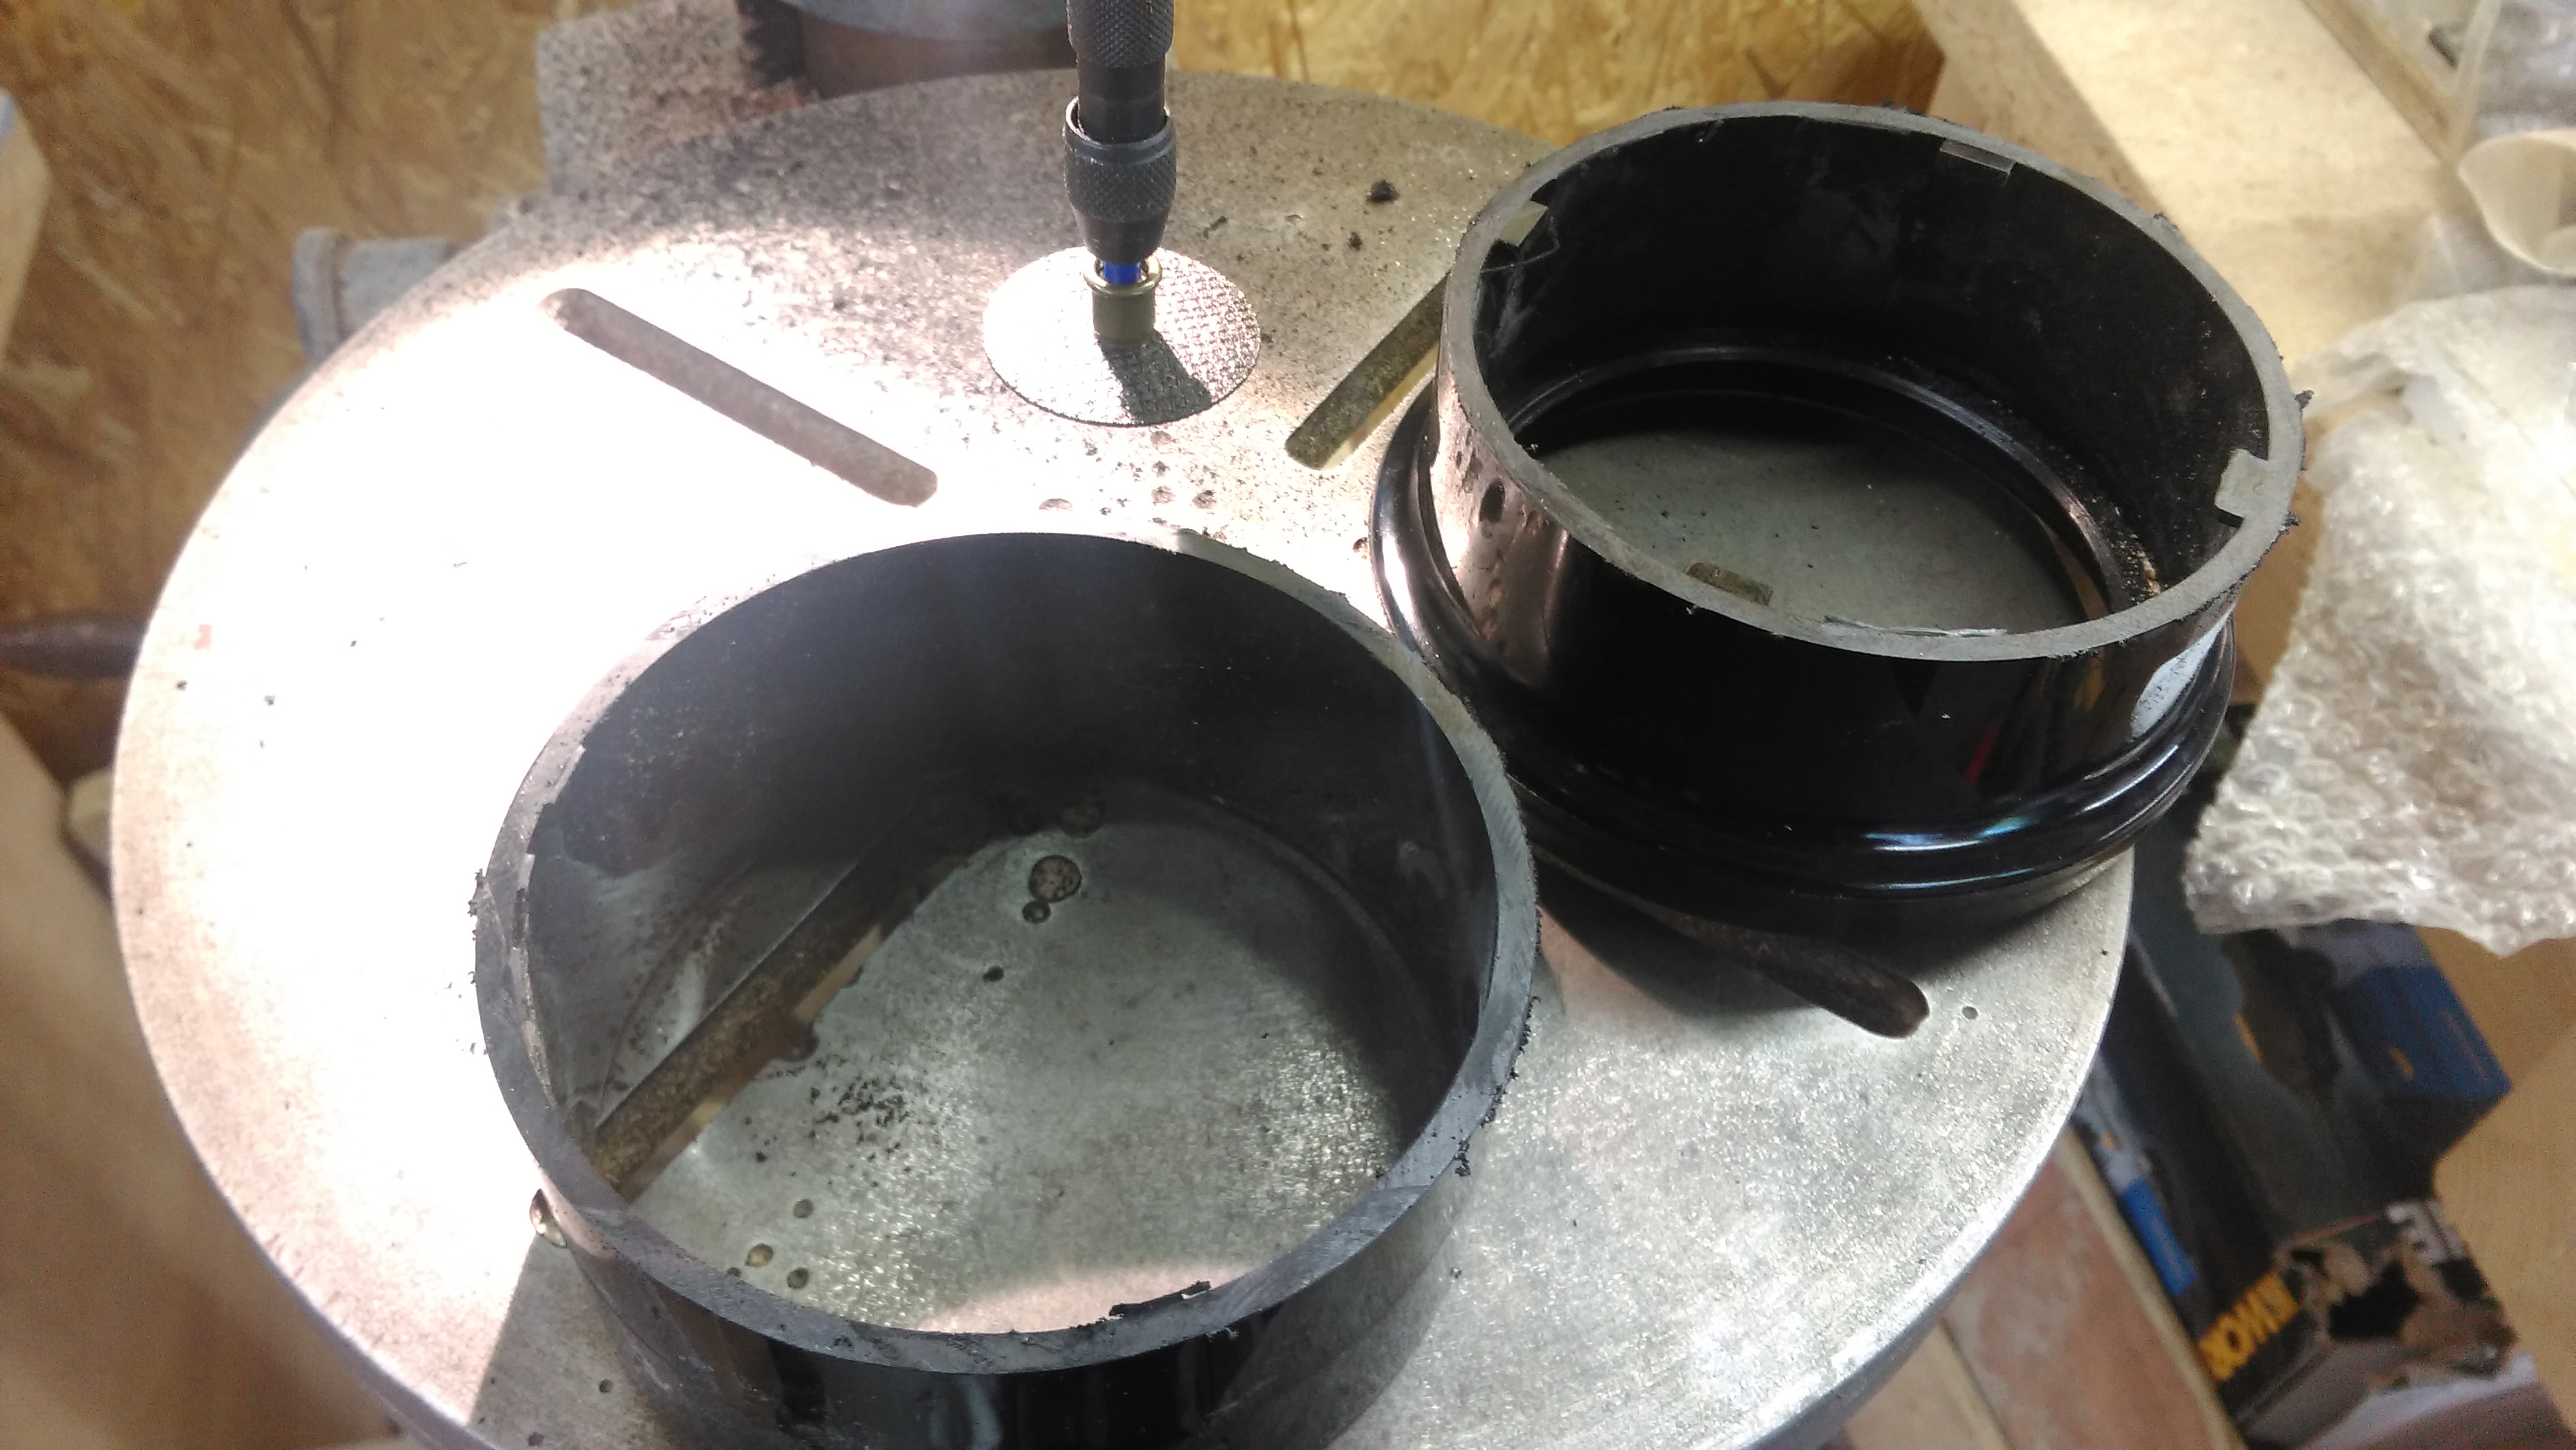
I cut mine to have the tabs on the end with the seal as that’s the one I plan to stick an extraction hose end into.
Once the coupling is cut, glue it in place on either side of the gate. I used Screwfix’s Pink Grip which hasn’t quite set right now but looks like it’s going to do the right thing.
So there we have it, Mark 1 blast gate. Stay tuned for Mark 2 which has electronics to control your extractor.
Great article and thank you for sharing